How to Set Up Google Cloud Storage for CloudSync Master for WordPress Plugin
Experience the ultimate power of CloudSync Master for WordPress! Our plugin offers you the opportunity to effortlessly offload your media to Google Cloud, revolutionizing your website’s performance and boosting your SEO rankings.
Unlocking the full potential of this plugin is a breeze. Simply follow our comprehensive step-by-step guide, designed to seamlessly walk you through the entire process. Start by creating your own Google Cloud account and enabling Google Cloud Storage. From there, you’ll embark on an exciting journey of setting up Google Cloud Storage, creating a personalized Google Cloud Storage bucket, granting public access to bucket objects, and generating a service account JSON. This integration will ensure flawless synchronization with CloudSync Master for WordPress.
Creating a Google Cloud Account #
Creating a Google Cloud account is a straightforward process that can be completed in just a few simple steps.
Follow these instructions to get started:
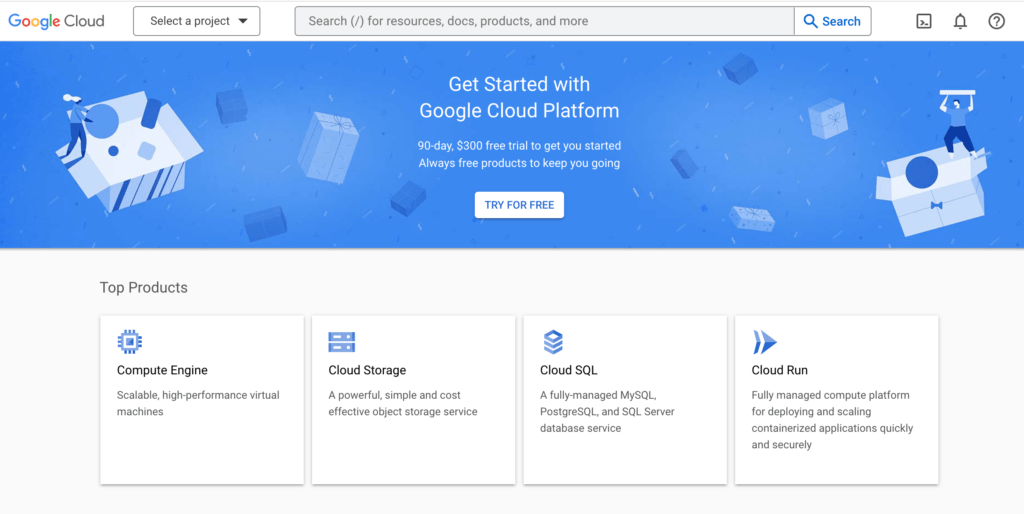
- Begin by visiting the official Google Cloud Console website, where you’ll manage all your cloud resources efficiently.
- If you don’t have a Google account yet, don’t worry. You can easily create one by clicking on the Create account button on the Google Cloud Console page. This process involves providing basic information, such as your name and email address.

- Once you’ve successfully created your Google account, sign in to the Google Cloud Console using your newly created credentials. Familiarize yourself with the console’s interface and the various features it offers. Don’t fret if you’re new to the console; Google provides ample resources to assist you in getting started.
- When you log into your Google Cloud Console account for the first time, you will need to create a new project. This project will act as a central hub for the management of all your cloud resources.
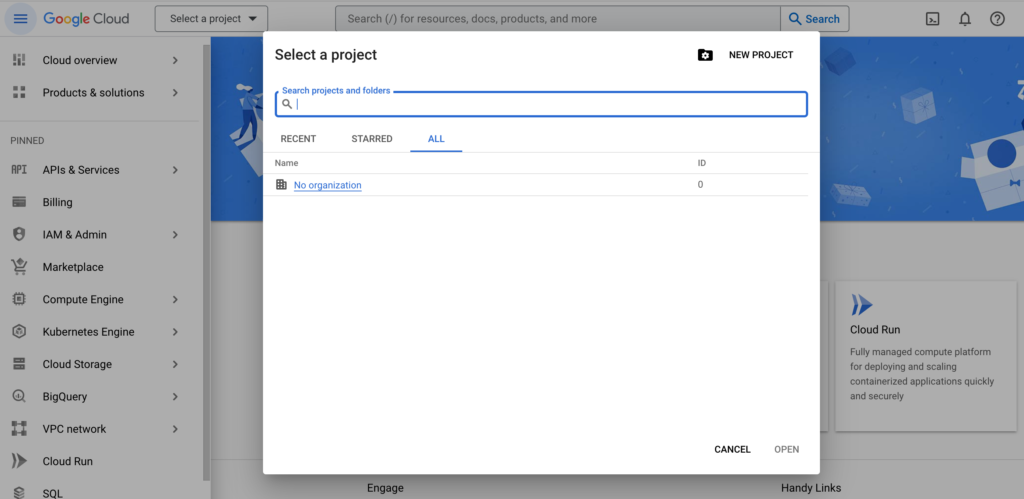
To create your project, locate and click on the Select a project dropdown. This will open a list of any pre-existing projects.
At the top-right corner of this list, you will find a link labeled NEW PROJECT. Click on this link, then simply follow the on-screen prompts to complete your project setup.
- Now that your project is created, you can delve into the multitude of services and products offered by Google Cloud. Whether you require a scalable compute engine, a robust data analytics platform, or a user-friendly database solution, Google Cloud has you covered.
Enabling Google Cloud Storage #
To enable Google Cloud Storage, follow these simple steps:
- Sign in to the Google Cloud Console using your account credentials.
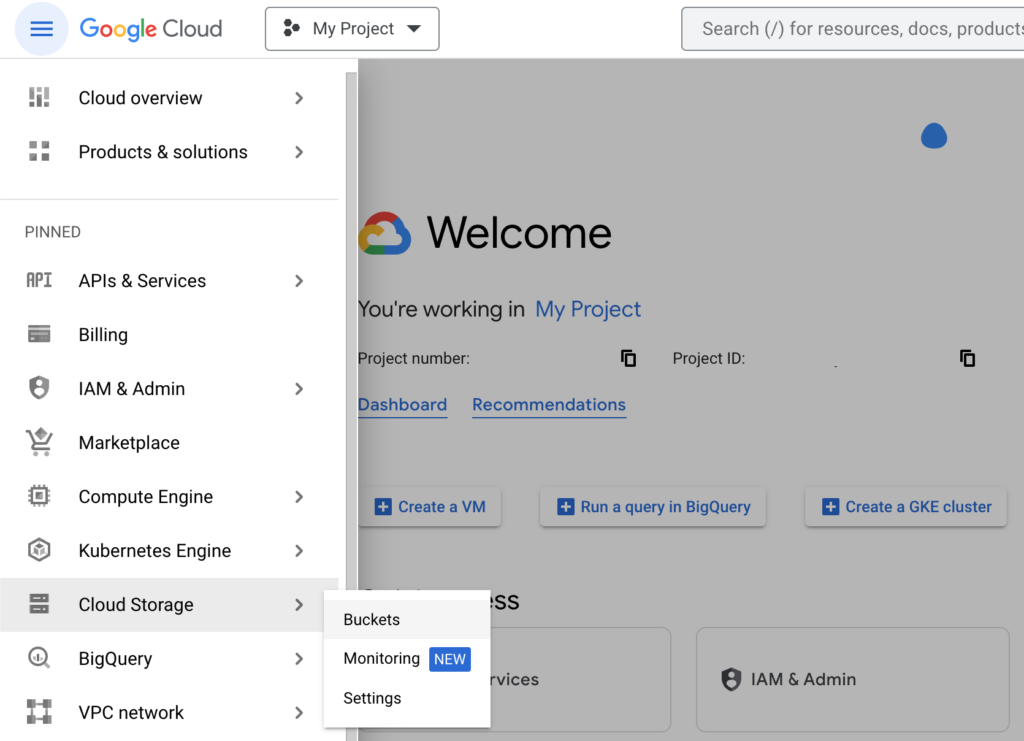
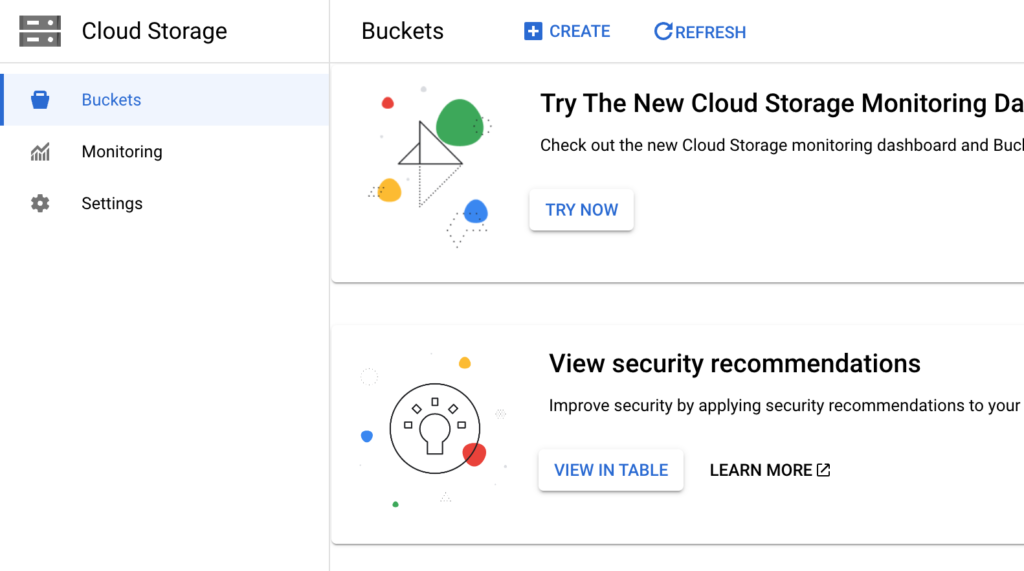
- Locate the hamburger menu icon in the upper left corner of the console and click on it to reveal a dropdown menu and from the menu options, select Cloud Storage and then choose Buckets.
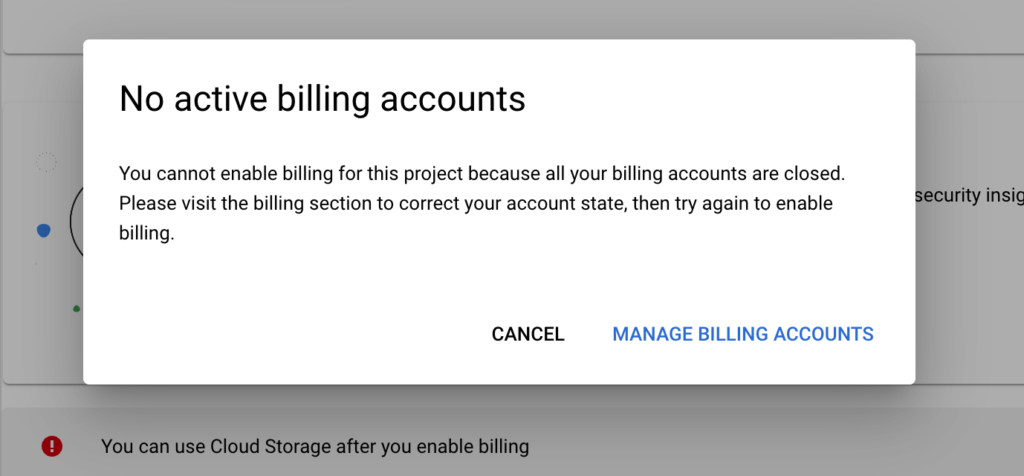
- If you are just starting to use Google Cloud then on the subsequent page, you’ll find an “Enable Billing” button.

Click on it and follow the prompts to setup billing:
- Now you should be ready to create your first Google Cloud Storage bucket.
Creating a Google Storage Bucket #
To create a Google Cloud Storage bucket for storing your data, adhere to the following steps:
- Within the Google Cloud Buckets dashboard, find and click on the CREATE link.
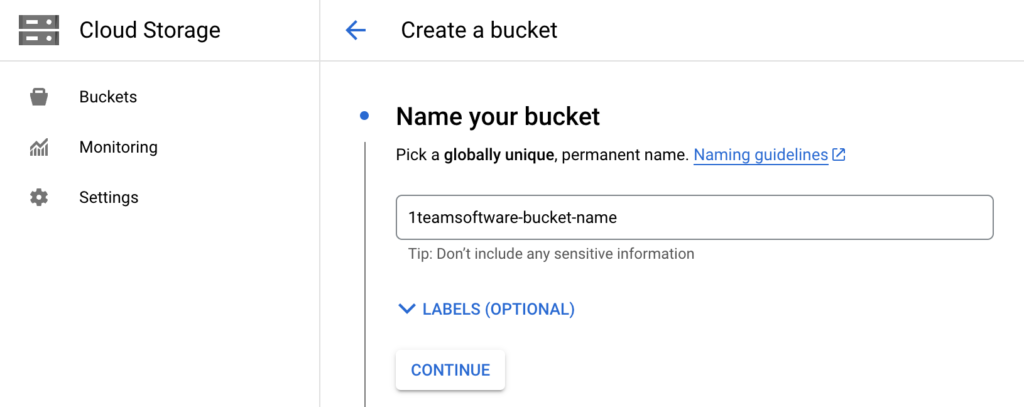
- Assign a unique name to your bucket, ensuring its distinctiveness across the Google Cloud platform and then hit Continue.
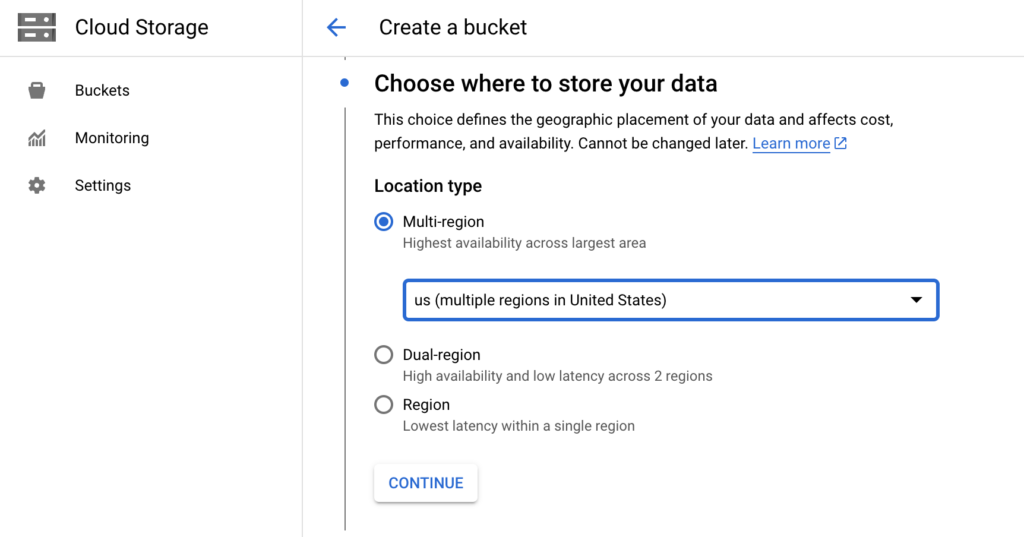
- Choose an appropriate location for your data storage. The selection should be primarily based on your specific requirements. Typically, selecting a Multi-region location type may provide optimal performance for public access to your assets.
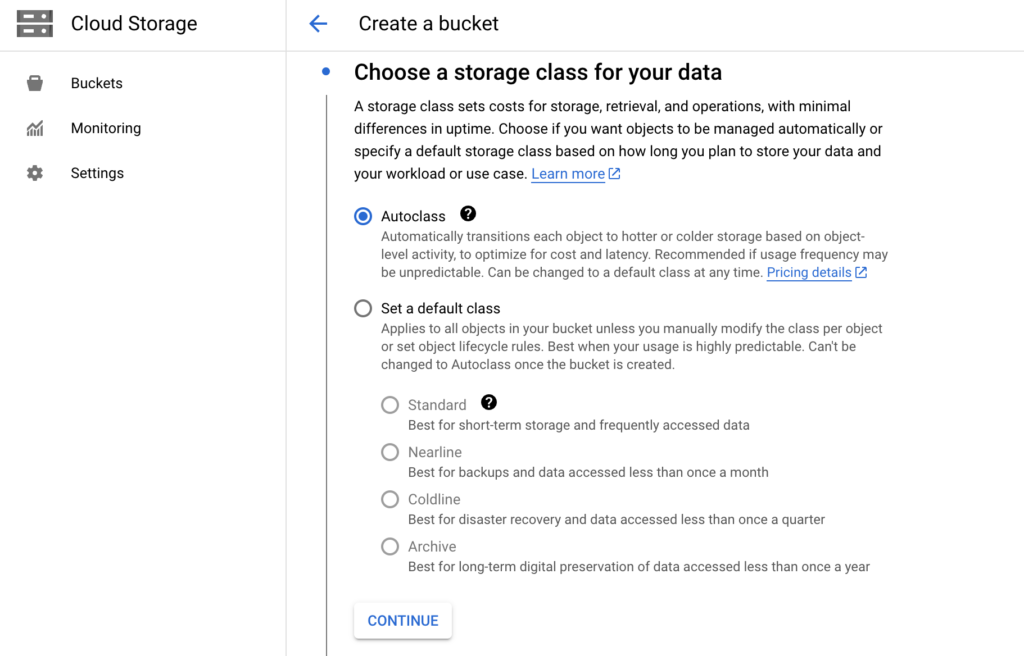
- Select a storage class for your data that best fits your needs. For the purposes of CloudSync Master for WordPress plugin, the Autoclass or Standard storage classes are usually the most effective choices.
- Select on the method for controlling access to objects. In our scenario, we recommend deselecting the “Enforce public access prevention on this bucket” option and opting for “Fine-grained” access control.
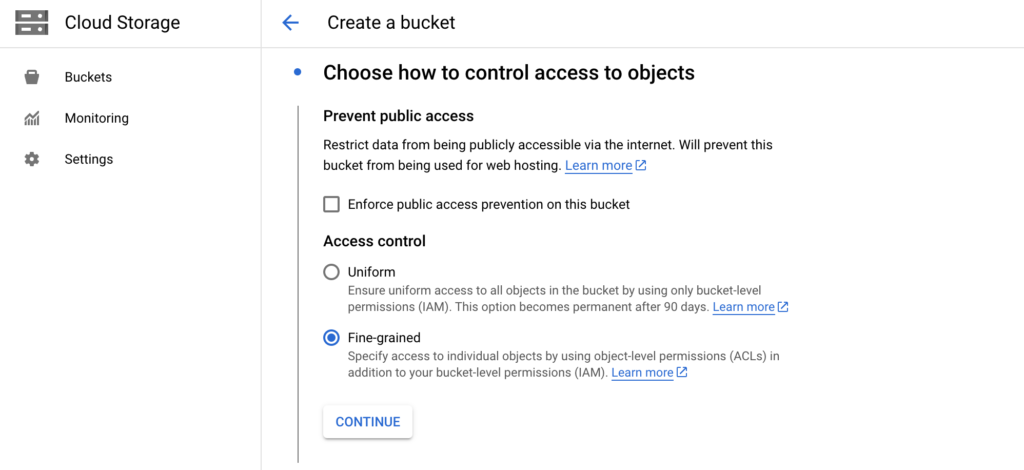
- Determine the protection level for your object data. Based on your specific requirements, we suggest selecting either None or Object versioning, which can be particularly useful for data recovery purposes.
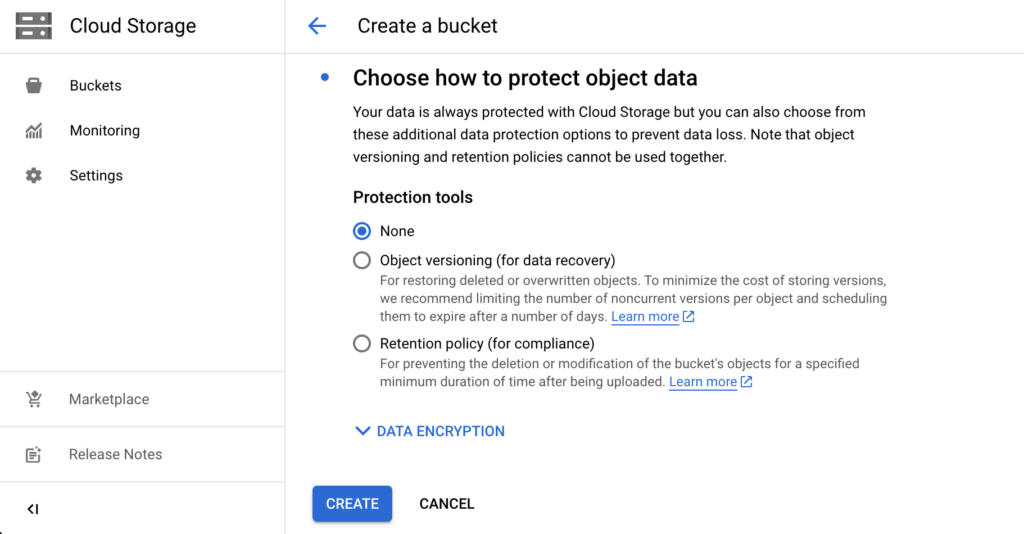
- Finally, to complete the creation of your Google Cloud Storage bucket, click on the Create button.
Allowing Public Access to Objects in the Bucket #
To grant public access to objects stored within your bucket, follow these instructions:
- Locate and click on the name of the bucket you recently created within the Google Cloud Storage Buckets dashboard.

- Once inside the bucket, navigate to the Permissions tab.
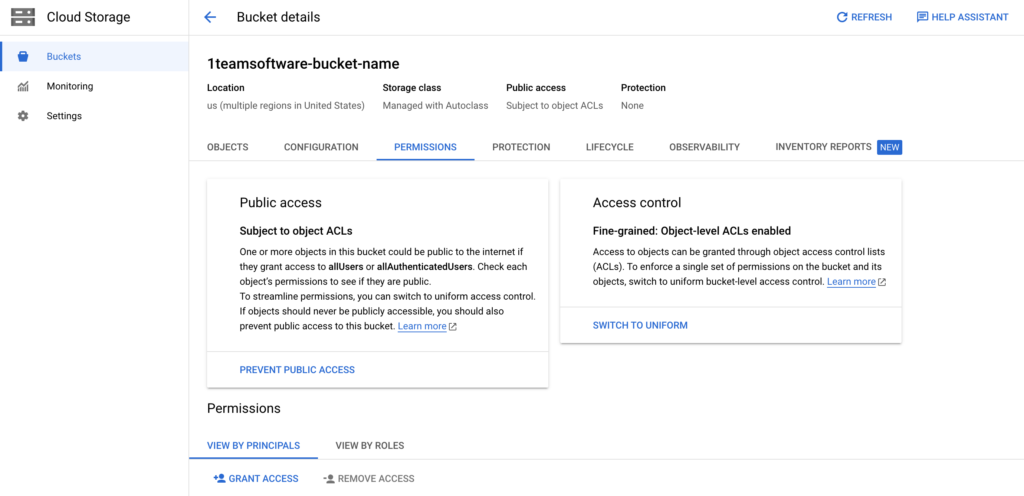
- Click on the Grant Access link which will open a dialog.
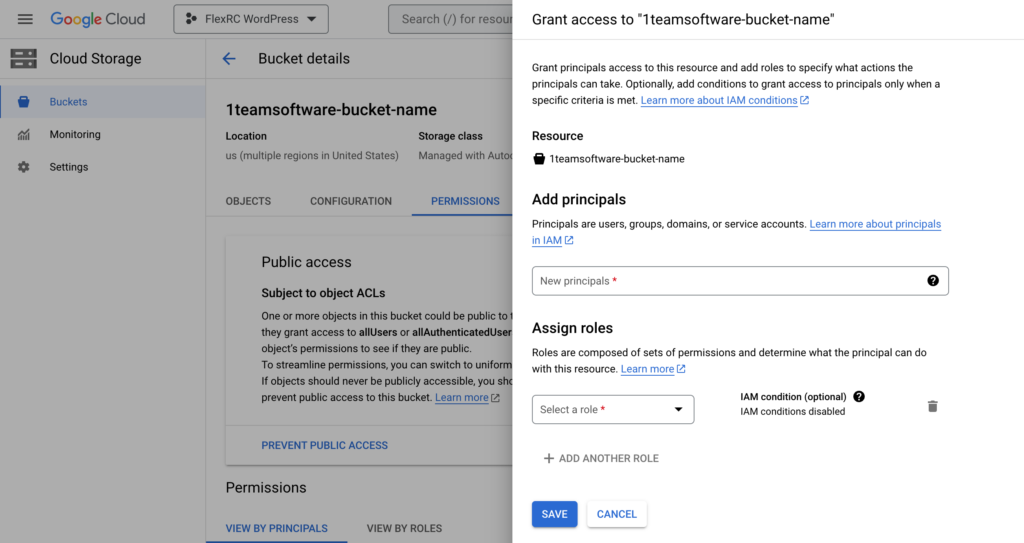
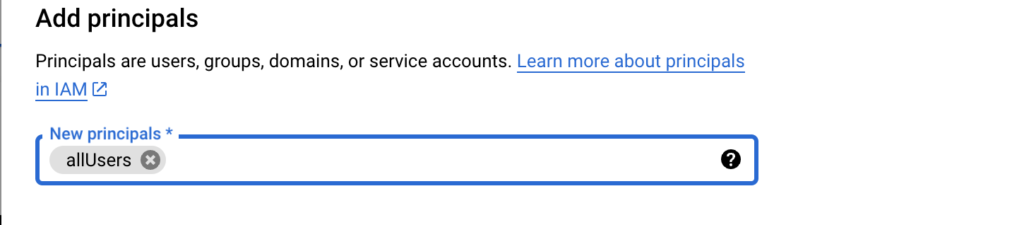
- Place your cursor in the New principals fields and input allUsers.
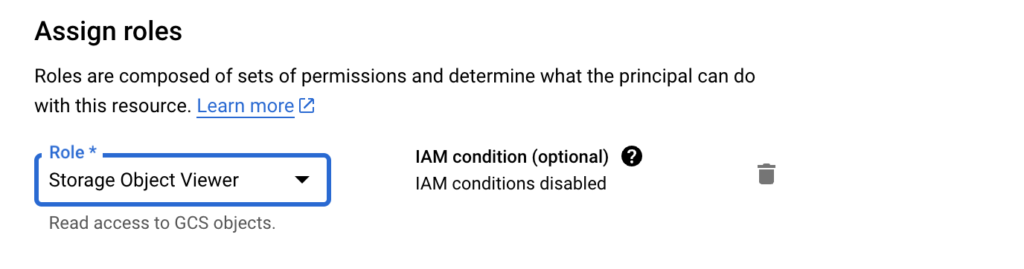
- Next, select Storage Object Viewer from the Select a role dropdown menu.
- To save your changes and apply the permissions, click on the Save button.
- Click Allow Public Access on a follow up dialog.

Creating a Service Account #
To generate a service account that can manage your bucket and obtain the necessary service account JSON for integration with the CloudSync Master for WordPress plugin, follow these steps:
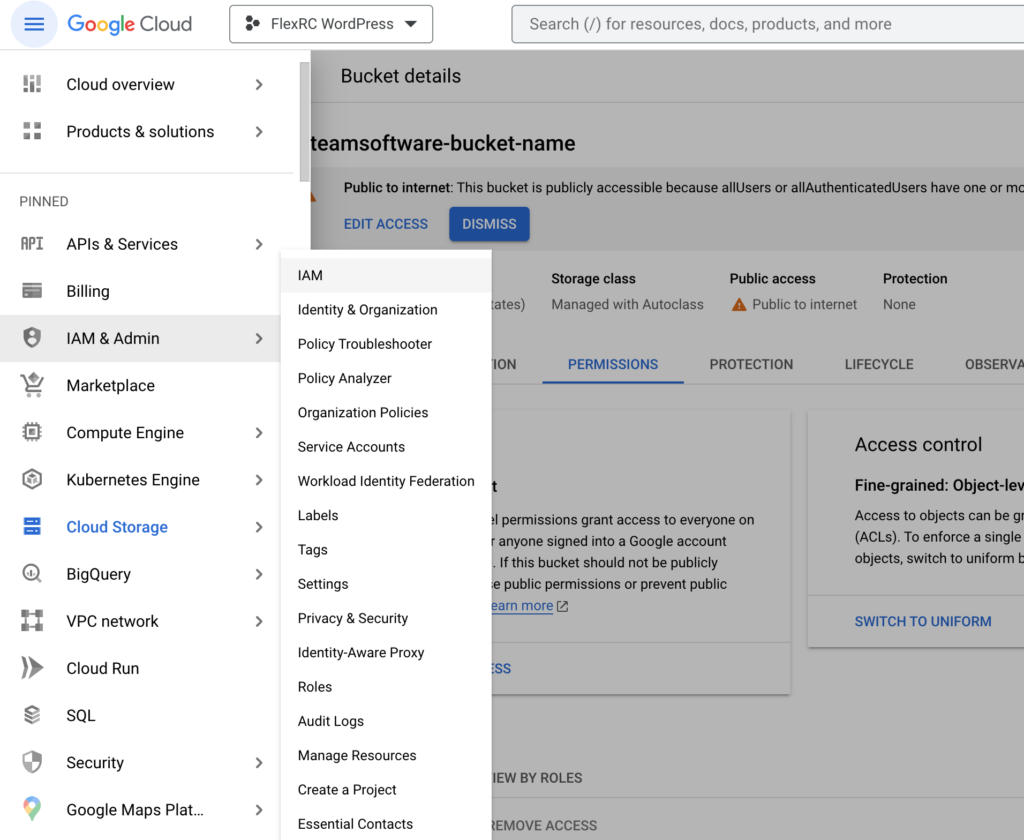
- In the Google Cloud Console, locate and select the hamburger menu in the upper left corner. From the displayed menu options, select IAM & Admin, followed by clicking on IAM.
- From the IAM & Admin menu on the left-hand side, please select Service accounts.
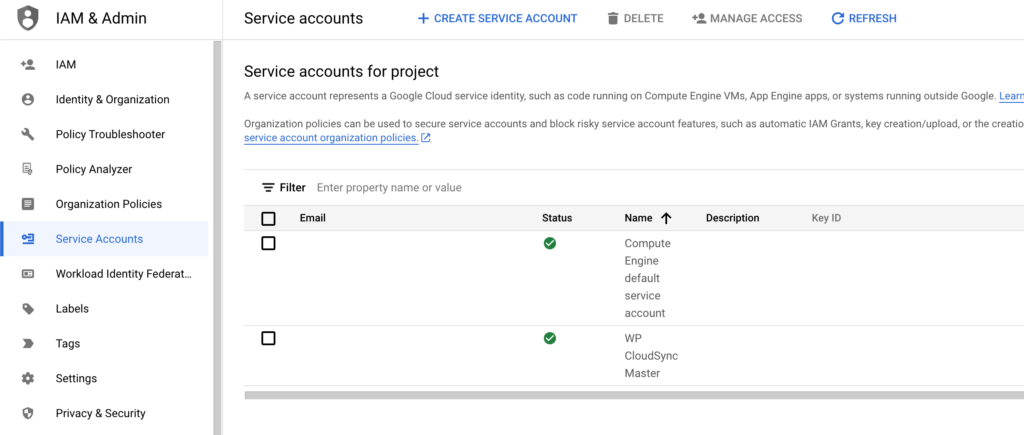
- Click on the Create service account button to initiate the service account creation process.
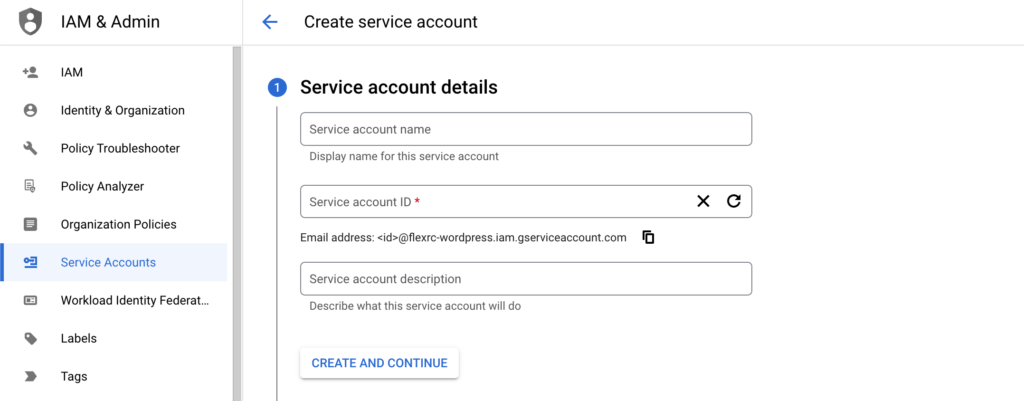
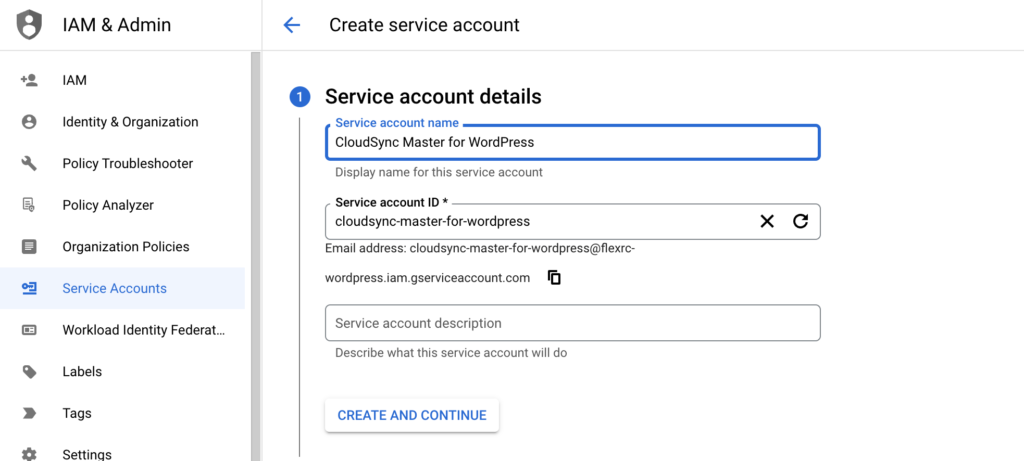
- Provide a name for your service account, and click on the Create and continue button to proceed.
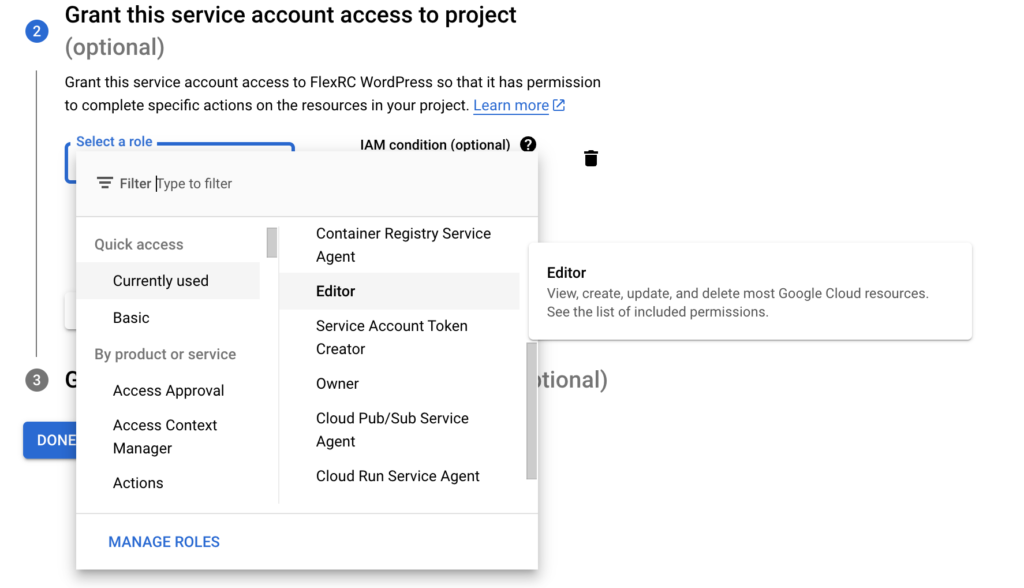
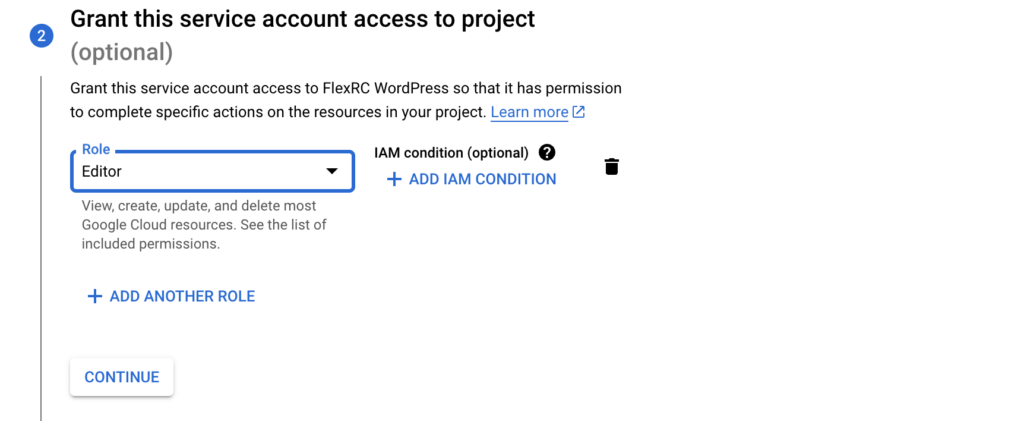
- Within the Grant this service account access to project section, assign the necessary permissions to the service account by selecting Editor from the Role dropdown menu.
- Next, click on Continue.
- Once you’ve made the necessary selections, click on the Done button to finalize the process.
Creating a Key and Downloading Service Account JSON #
To create and obtain Service Account JSON:
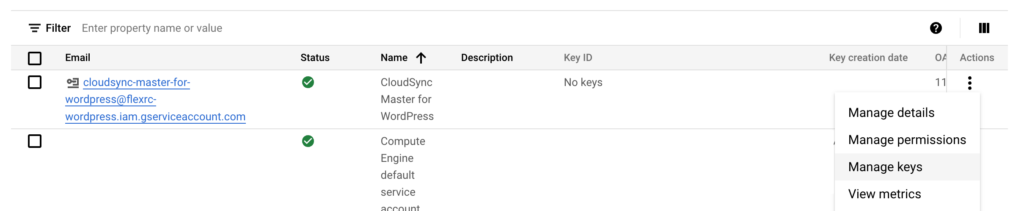
- To retrieve the service account JSON file, locate the three-dot icon to the right of the newly created service account and click on it. From the dropdown menu that appears, select Manage keys.
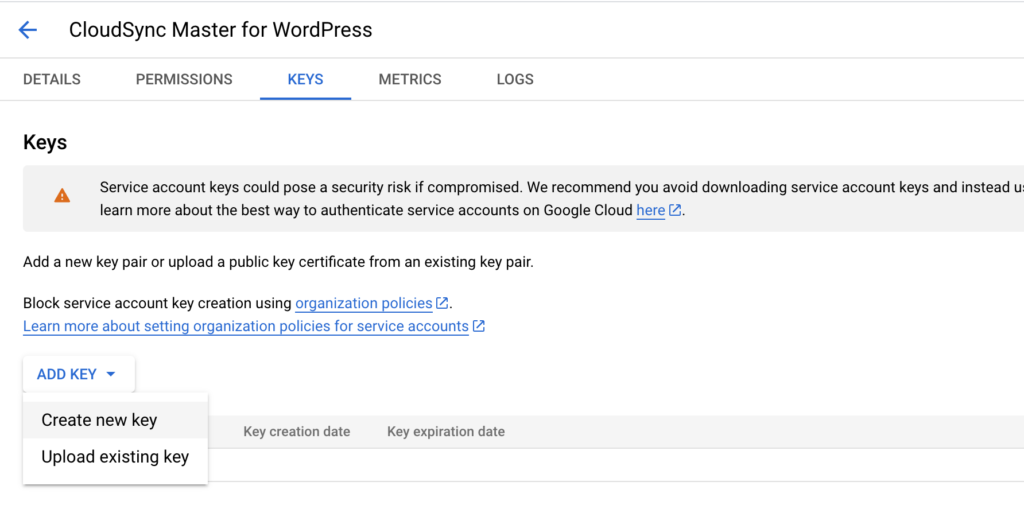
- Next, click on the Add Key dropdown menu and choose the Create new key option.
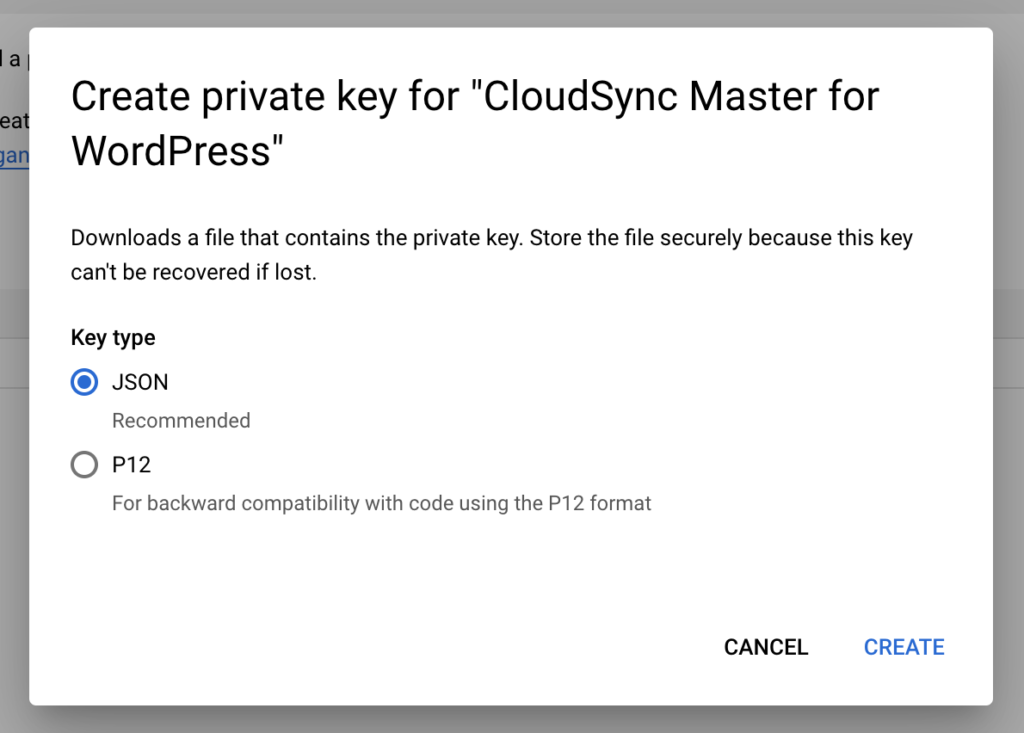
- Choose “JSON” as the key type, and click on the “Create” button. The service account JSON file will be downloaded to your computer.
Next steps #
Congratulations! You have successfully created a Google Cloud account, enabled Google Cloud Storage, established a Google Storage bucket, allowed public access to bucket objects, and generated a service account with the corresponding JSON file for seamless integration with the CloudSync Master for WordPress plugin. You are now ready to proceed with the setup of the plugin, utilizing the obtained credentials.
Do you want to learn more? #
Should you require any further assistance or detailed guidance, refer to the official Google Cloud Storage documentation or reach out to the dedicated Google Cloud support team. Embrace the power of Google Cloud Storage and unlock endless possibilities for efficient and scalable storage solutions tailored to your WordPress website.
Start your journey towards the infinite possibilities of cloud computing and enhance your website performance by offloading media files to Google Cloud Storage and CloudSync Master for WordPress!


