How to Create Multiple Shipping Labels for a Single WooCommerce Order
In our previous documentation, we explained how to configure WooCommerce shipping plugins to enable the feature to allow multiple shipping labels per order.
In this guide, we’ll walk you through the step-by-step process of creating multiple shipping labels for a single order using popular WooCommerce shipping plugins such as:
- Shippo Shipping PRO for WooCommerce
- ShipStation Shipping PRO for WooCommerce
- EasyPost Shipping PRO for WooCommerce
And other compatible WooCommerce shipping plugins.
Step 1: Review the Package Information #
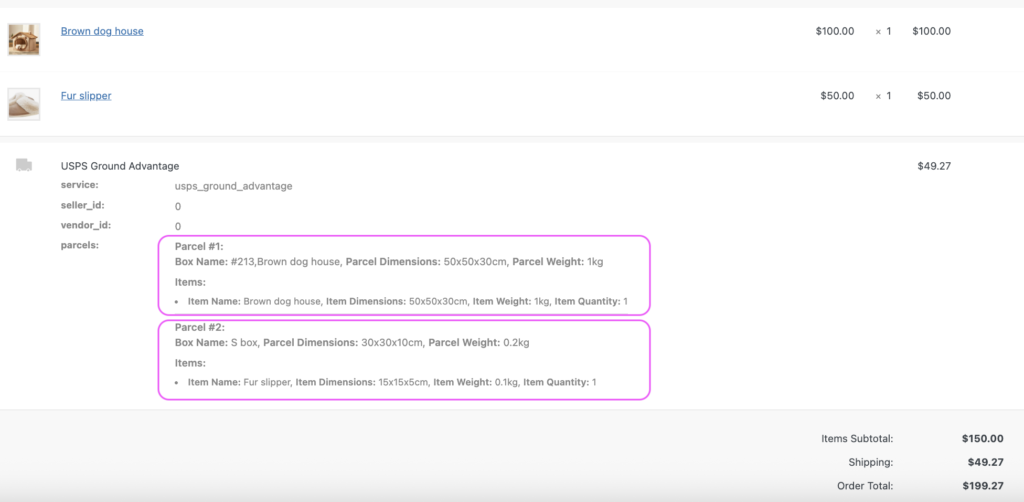
If your WooCommerce shipping plugin has automatically assigned multiple shipping packages to an order, you will see them listed under the shipping services and shipping Cost section on the order details page.
You’ll see information like:
- Parcel #1, Parcel #2, etc.
- Box names
- Dimensions and weight of each package (including the products inside)
✅ Tip: This section helps you confirm that the package dimensions and weights match your expectations. These details are used by the plugin to calculate live shipping rates accurately.
Example Screenshot
In our test order example, there are two packages: Parcel #1 and Parcel #2. Each shows the product assigned to that box, the box name, and the final calculated dimensions and weight for shipping
If a product is too large for the pre-configured box sizes, the plugin will use the product’s own dimensions and weight.
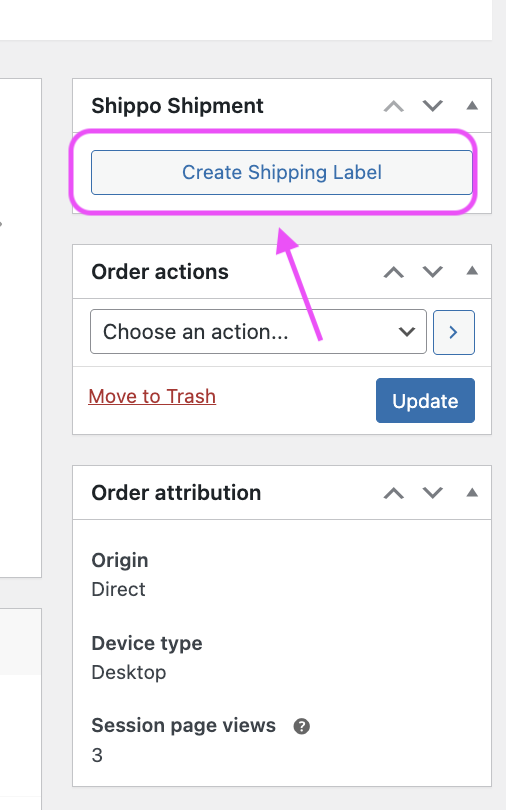
Step 2: Click “Create Shipping Label” #
On the order page, click the “Create shipping label” button located on the far right of the package section.
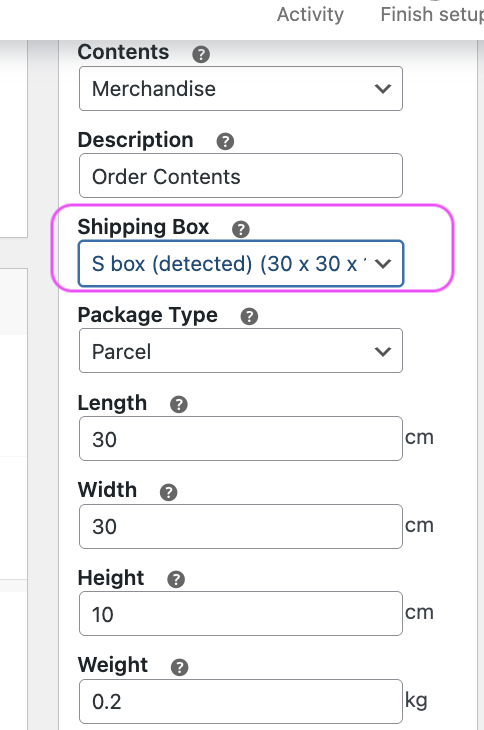
A panel will expand, showing the final package dimensions and weight for each shipping box.
- Packages automatically detected by the plugin will be marked as “Detected”.
📦 In this test example, Shippo Shipping PRO detected two packages. Because the Dog House product didn’t fit in the pre-configured shipping box, the plugin defaulted to using the product’s original size and weight.
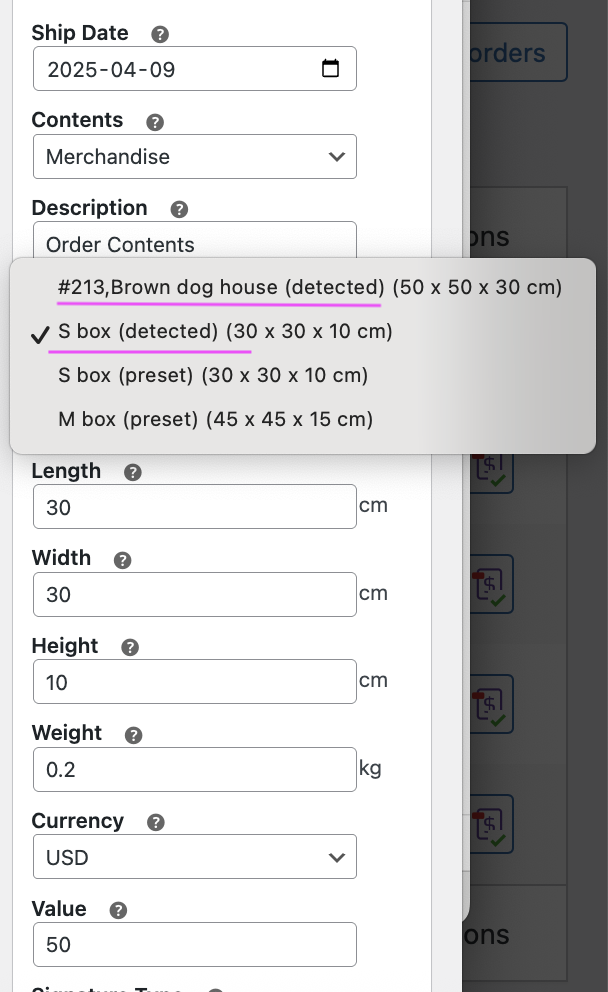
Step 3: Switch Between Packages #
You can select different packages by clicking on the shipping box column.
For example, in our test order:
- Parcel #1 corresponds to the shipping box – S box, which includes the test product 1
- Parcel #2 corresponds to the second shipping box – Brown dog house (product itself). which includes the test product 2.
Switch between packages to review the dimensions and weight of each one. Confirm that the values match the actual shipping package details. If they don’t, you can manually adjust them by entering the correct dimensions and weight.
Step 4: Get Shipping Rates #
Once you’ve selected a package, click the “Get a Quote” button.
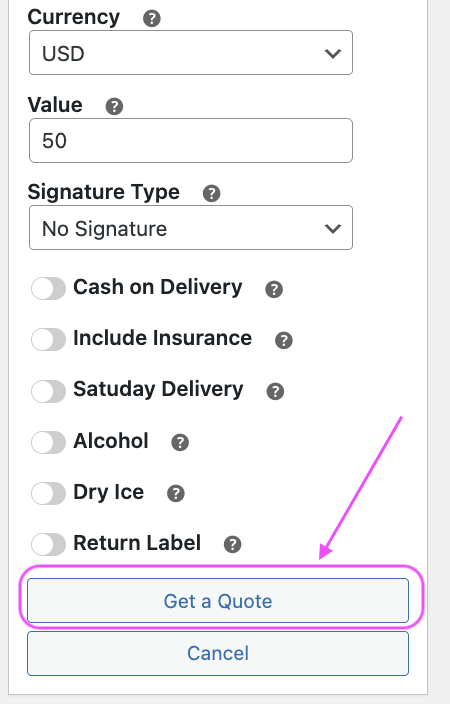
The plugin will retrieve and display live shipping rates based on the selected package’s dimensions and weight, as well as the available shipping services for the chosen shipping box.
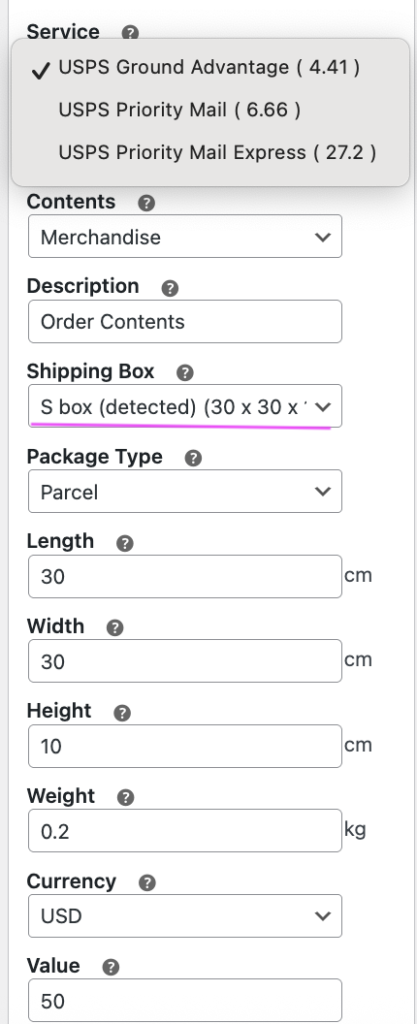
Step 5: Purchase & Print the Shipping Label #
- Select the shipping service you’d like to use. By default, the plugin will preselect the shipping service that the customer chose and paid for the order.
- Click “Print Shipping Label” to purchase the label and generate it.
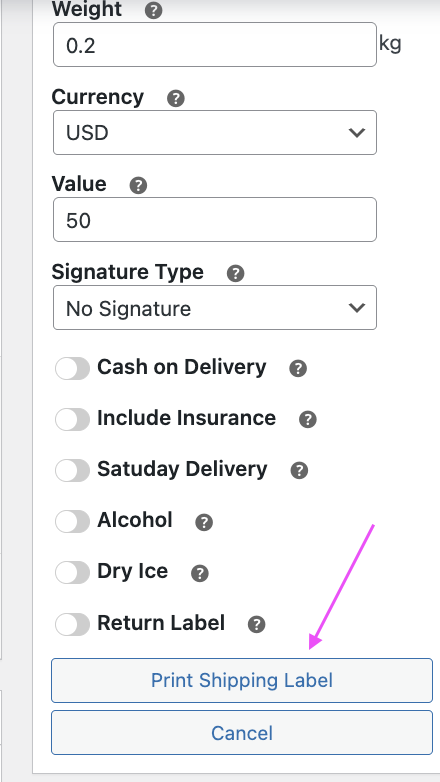
- Then you will see a window of the shipment information for confirmation before purchasing the label
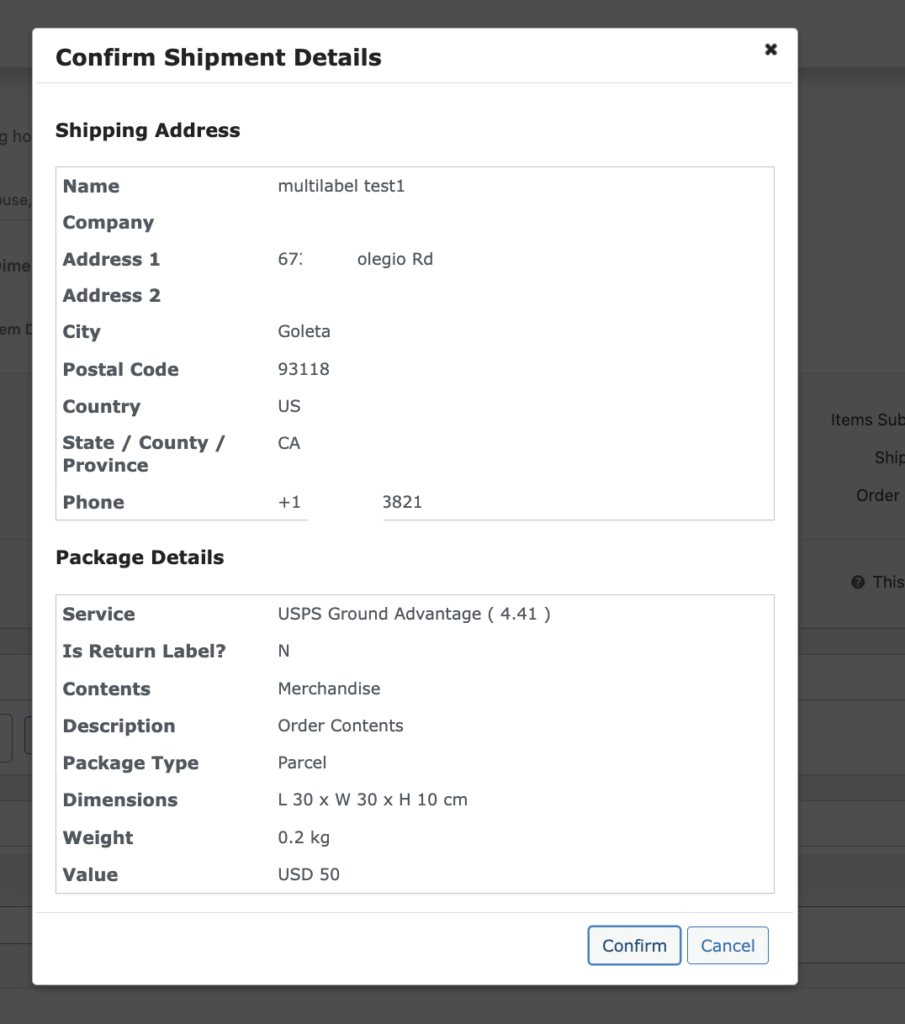
- Click “confirm,” then the plugin will purchase a shipping label.
- Print the shipping label
Step 6: Repeat for the Second Package #
Next, repeat the same steps to retrieve a shipping rate quote for the second package. Once you’ve selected a service, proceed to purchase the shipping label.
Summary #
By following the steps above, you can easily create and manage multiple shipping labels for a single order in WooCommerce using compatible WooCommerce shipping plugins.
Related article:
How to Enable Multiple Shipping Labels for a Single Order
How to Configure Shipping Boxes in WooCommerce Shipping Plugins


