E-Commerce Shipping
How to Update Your EasyPost Plan ( Feb, 2026)
Due to a recent change to EasyPost’s pricing plans, which will take effect on February 23, 2026, we strongly recommend users of EasyPost and the Multi-Carrier EasyPost Shipping PRO plugin review and update your EasyPost plan to avoid any unexpected charges.
Please log in to your EasyPost account and select the plan that best fits your needs by following the steps below.
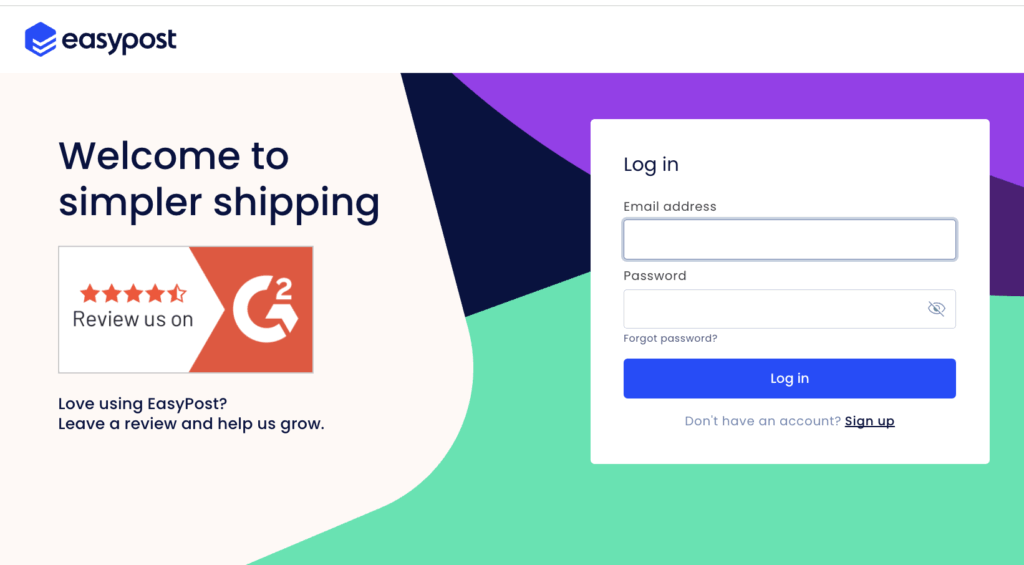
Step 1: Log in to Your EasyPost Account
Log in to your EasyPost account
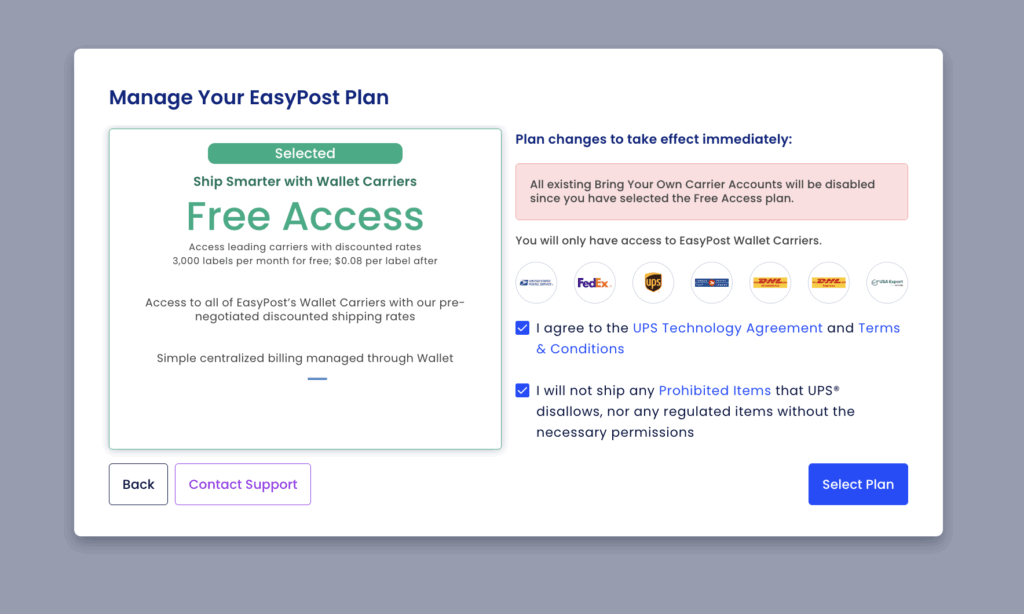
Step 2: Choose Your EasyPost Plan
After logging in, a pop-up window will appear (as shown in the screenshot below), requesting you to select a plan:
- Free Access Plan (using the EasyPost Wallet carrier), or
- Bring Your Own Carrier Account plan ($20/month)

Select the plan that best suits your needs, then click the blue “Next” button below the selected plan.
In this guide, we selected the Free Access Plan.
Step 3: Confirm Your Plan Selection
On the next screen, you’ll see a summary of the plan you selected.
- Review the plan details
- Agree to the terms and services shown on the right-hand side
- Click “Select Plan” to confirm your choice
Step 4: Optional – Add Funds to Your Account
You will then be taken to a page where you can add funds to your EasyPost account.
- If you’d like to add funds now, you may do so
- If not, simply click “I’ll Do This Later” to continue

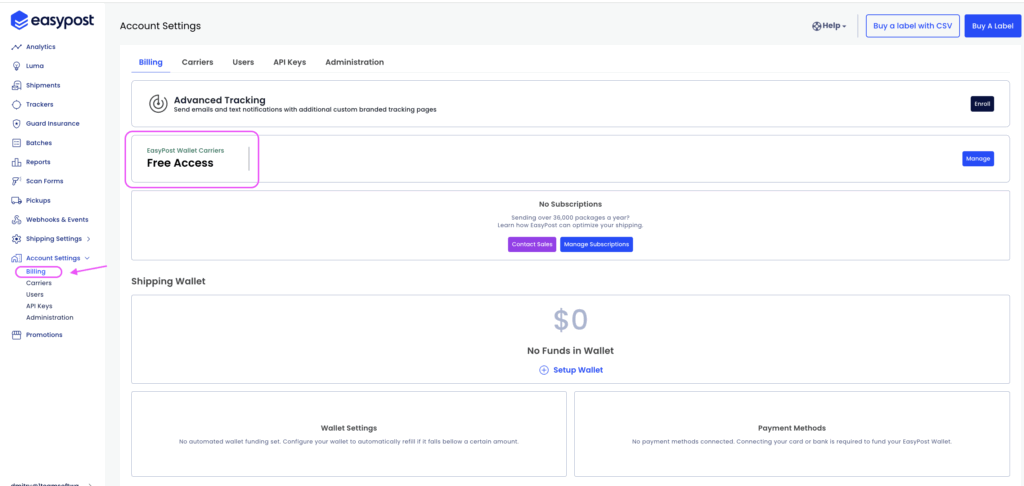
Step 5: Verify Your Active Plan
After completing the steps above, you’ll be redirected to your EasyPost account dashboard.
To verify that your plan was updated successfully:
- Click “Account Settings” in the left-hand menu
- Select “Billing”
- Your current plan will be displayed on the right-hand side
✅ You’re All Set!
You’ve now successfully updated and confirmed your EasyPost plan.
Please make sure this setup is completed before February 23, 2026, to avoid any unwanted charges.