How to setup bulk purchase postage workflow?
In this document we will go over postage purchase workflow settings of WooCommerce shipping plugin and talk about what they control and when you might want to change them.
How does it work? #
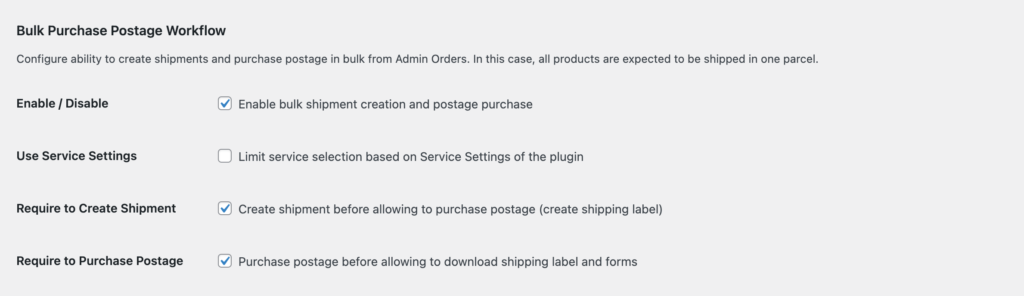
WooCommerce shipping plugin’s bulk postage purchase workflow settings let you control a number of steps you wish to take before printing shipping labels in bulk.
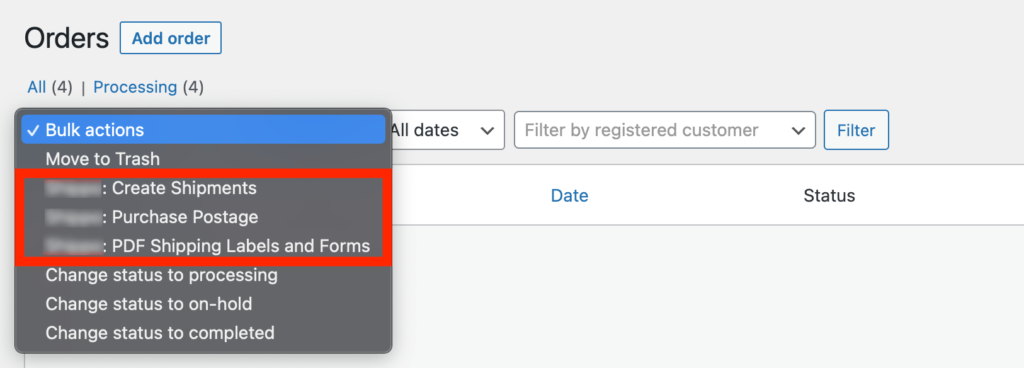
Example #1: You can enable Require to Create Shipment, so then you will have to create shipments first after that you can deposit required amount of money on the carrier’s website and then proceed with the purchase and printing of the shipping labels.
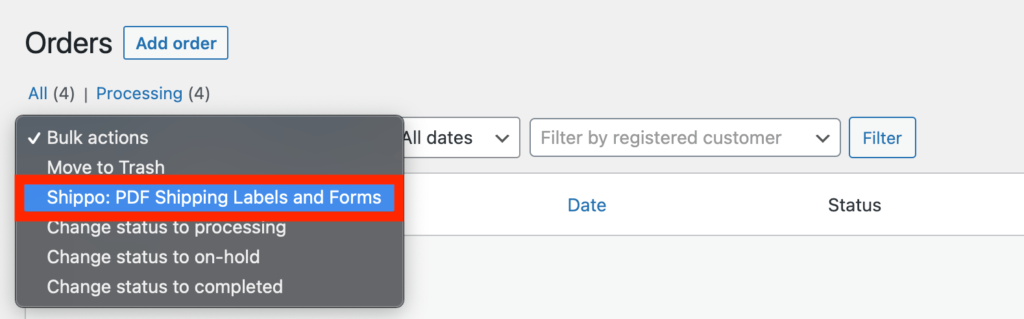
Example #2: You can uncheck Require to Create Shipment and Require to Purchase Postage, so then you will be able to print shipping labels in a single click.
Enable / Disable #
If enabled, then WooCommerce Orders page will be enhanced with the small shipment form that will display detected parcel details with the possibility to adjust them.

Depending on the values of the other bulk postage purchase workflow settings described below, bulk actions menu will have a few additional options available in it.
Use Service Settings #
If enabled, then selection of the shipping services and their names will be controlled by the Services settings described before.
Require to Create Shipment #
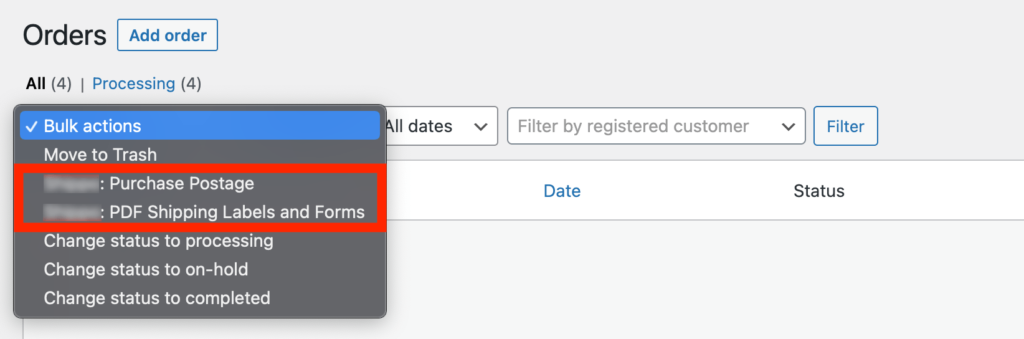
If enabled, then Create Shipments action will be available in bulk actions menu and you will be required to create a shipment before you can purchase postage and print shipping labels.
Otherwise you won’t see Create Shipments menu item and that step won’t be required.
Require to Purchase Postage #
If enabled, then Purchase Postage action will be available in bulk actions menu and you will be required to purchase postage before you will be able to print shipping labels.
Otherwise you won’t see Purchase Postage menu item and that step won’t be required.