E-Commerce Shipping
Ultimate Guide: How to Configure Live Shipping Rates for Multi-Warehouse WooCommerce Stores
Are you running a WooCommerce store with products sourced from multiple locations? If so, you’ve likely encountered the challenge of managing shipping rates accurately. This comprehensive guide will walk you through the process of setting up live shipping rates for multi-warehouse operations, ensuring your customers get correct live shipping rates in the shopping cart.
We’ll cover how to set up shipping classes, create shipping zones, and configure shipping services efficiently for different warehouses.
Why Multi-Warehouse Shipping Matters
In today’s competitive e-commerce landscape, offering products from various locations can significantly boost your business. It allows you to:
- Expand your product range.
- Reduce shipping times.
- Minimize shipping costs.
- Improve customer satisfaction.
To harness these benefits, you’ll need the right tools and know-how. That’s where WooCommerce plugins developed by 1TeamSoftware come into play, offering robust solutions for your multi-warehouse shipping needs.
Essential Plugins for Multi-Warehouse Shipping
To streamline your multi-warehouse shipping process, you’ll need two key plugins:
- Shipping Packages Plugin: This free plugin, developed by 1TeamSoftware, allows you to group products into packages based on various criteria, including Shipping Class, Product ID, Product Type, Attributes, Categories, Tags, and Vendors.
To download the free WooCommerce Shipping Packages plugin, simply click the graphic below.
We have prepared a video to guide you through configuring the Shipping Packages plugin. Click the graphic below to watch the tutorial.
- WooCommerce Live Shipping Rates Shipping Plugins: To display live shipping rates calculated from multiple locations, you’ll need one of 1TeamSoftware’s popular WooCommerce shipping plugins.
Our live shipping rates plugins include Shippo Shipping Pro, ShipStation Shipping Pro, EasyPost Shipping Pro, and more. Click here to explore the range of shipping plugins developed by 1TeamSoftware.
Step-by-Step Configuration Guide
Let’s walk through the process of setting up multi-warehouse shipping using two example warehouses: one in New York and one in California. By the end of this guide, you’ll be equipped to handle shipping logistics seamlessly, ensuring a smooth and efficient process for your customers.
The Importance of Configuring Shipping Classes
For businesses that operate from multiple warehouses or have multiple vendors, implementing Shipping Classes is an effective strategy. This method allows you to categorize products based on their origin, streamlining the process of managing and tracking shipments.
How to Create a WooCommerce Shipping Class
Follow steps below to create shipping class for different warehouses.
- First, go to WooCommerce -> Settings -> Shipping.
- Then navigate to Classes tab.
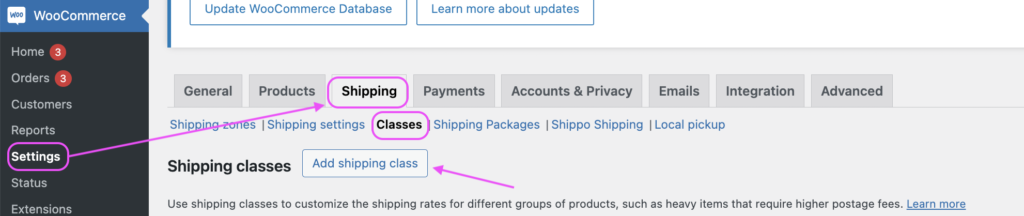
- After that hit Add Shipping Class button and create a new shipping class corresponding to your different shipping warehouses.
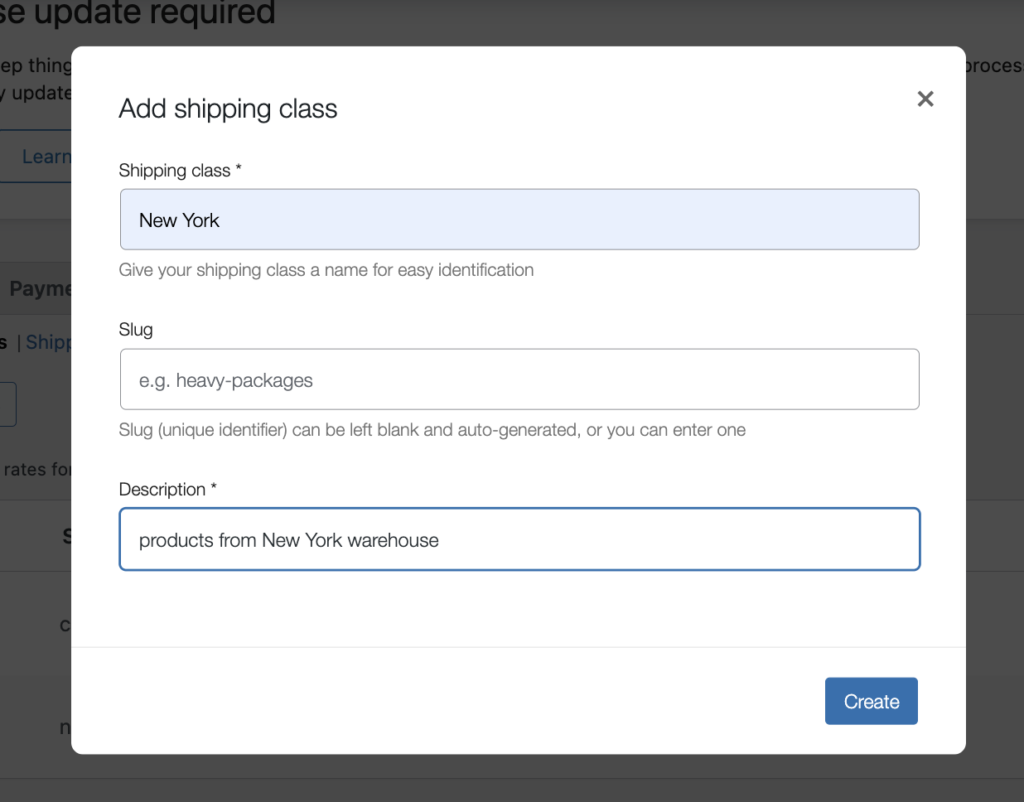
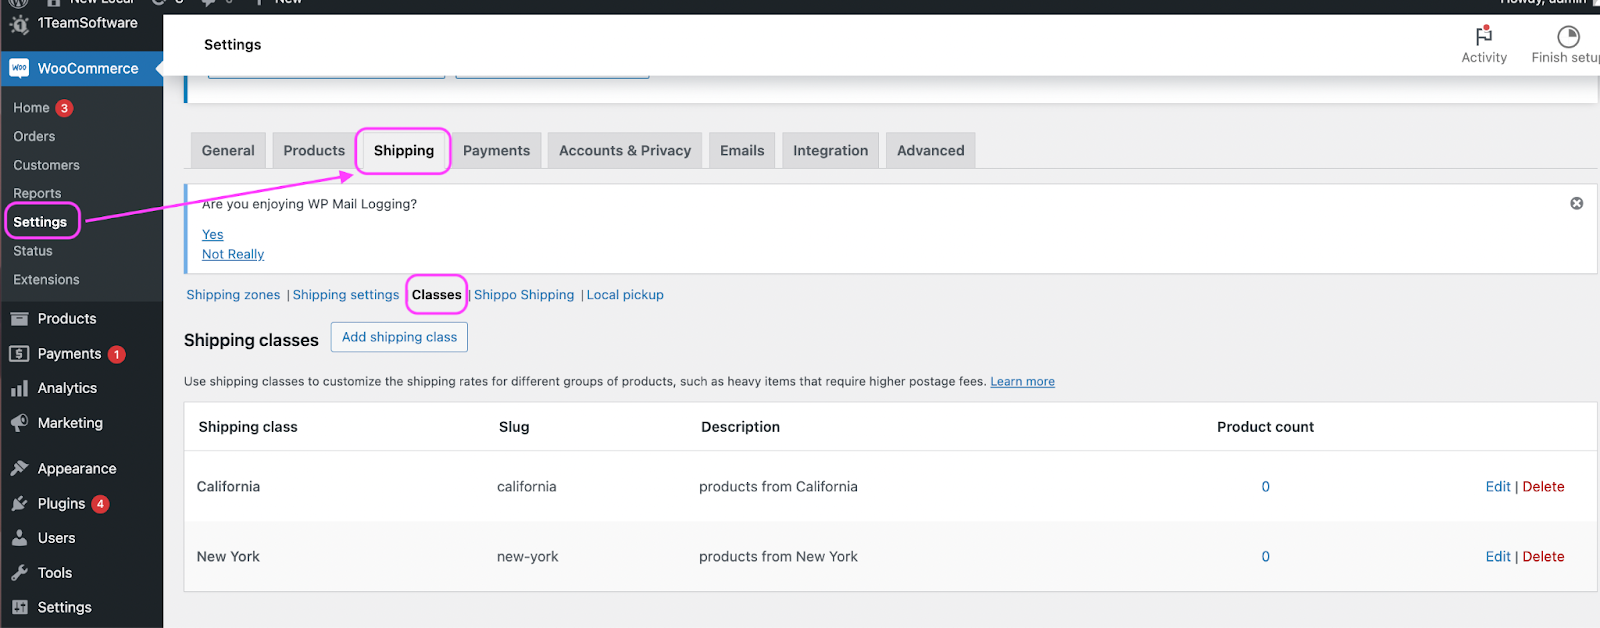
- For example, if you have one shipping location in New York and one in California, you can create two shipping classes named “New York” and “California“.
- Save your changes.
Steps to Assign Shipping Class to The Products In WooCommerce
Here we will assign shipping classes to the products based on their warehouse locations.
- Select the “Products” Tab, then go to the product you want to assign shipping class, and click on “Edit”.
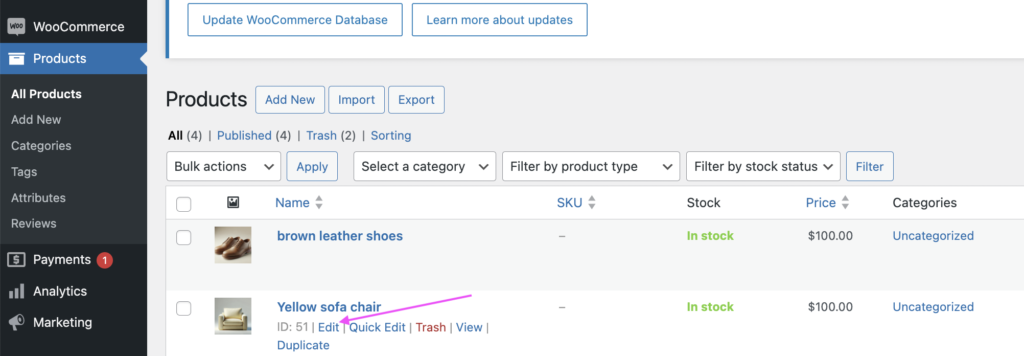
- You will be direct to the product information page.
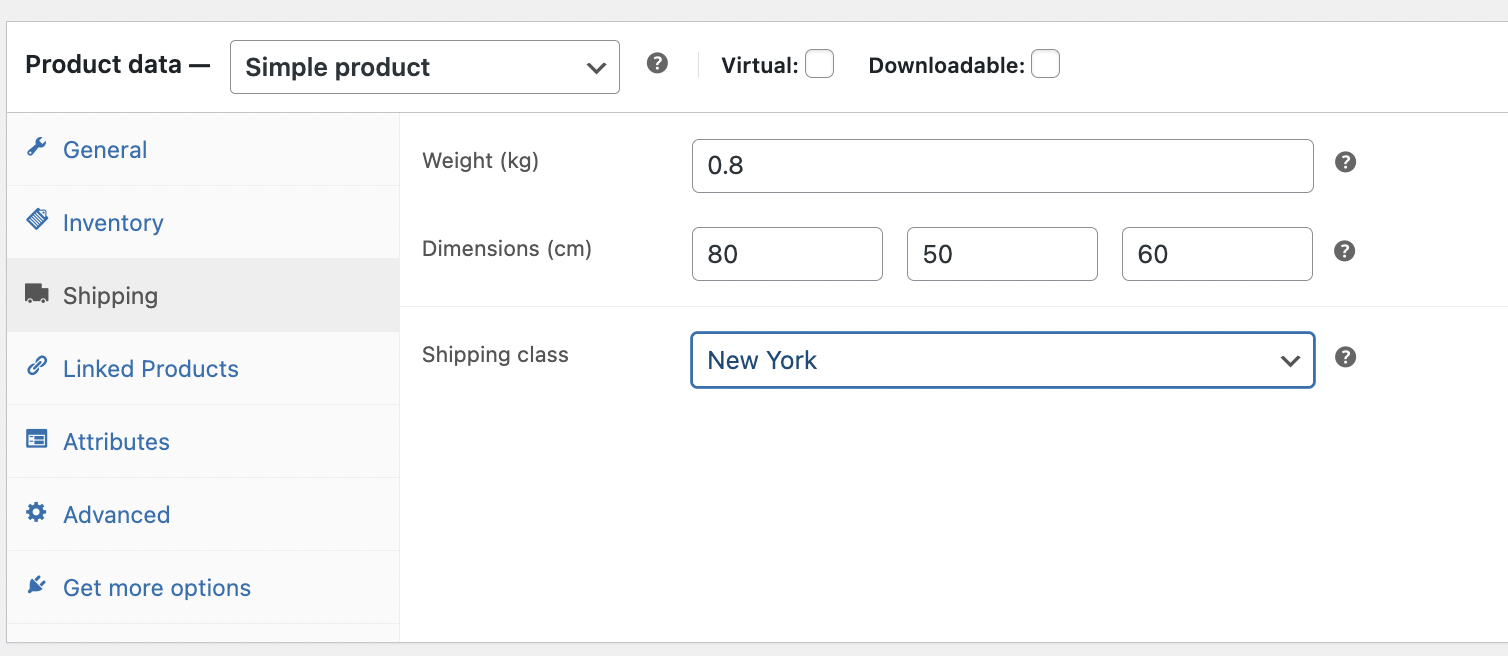
- Select “Shipping” tab in Product data.
- Then click on “Shipping class” dropdown box and select the corresponding shipping class based on the products’ warehouse location.
- In this step, we will select “New York” as the shipping class for this product.
- Update the product.
- Repeat this process for all your products, ensuring each is assigned to the correct warehouse location.
For example, all products that ship from New York should be assigned to the “New York” Shipping Class, and all products that ship from California should be assigned to the “California” Shipping Class.
Instructions for Configuring the 1TeamSoftware Shipping Packages Plugin
Install and activate the free Shipping Package Plugin from 1TeamSoftware
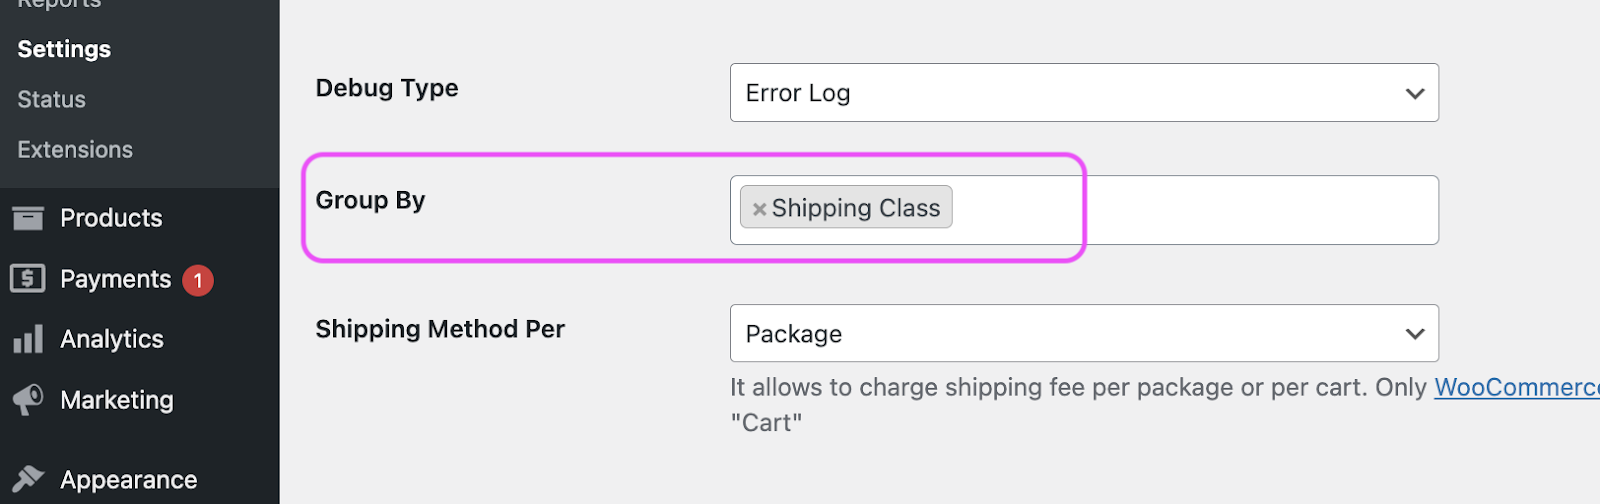
Navigate to the plugin settings. We will set up the “Group By” rules to categorize products according to their “Shipping Classes“.
- In the “Group By” column, select “Shipping Class”.
- This will group the products based on their respective shipping classes (warehouse locations).
- Products shipped from the same warehouse will be combined into the same package on the cart and checkout pages.
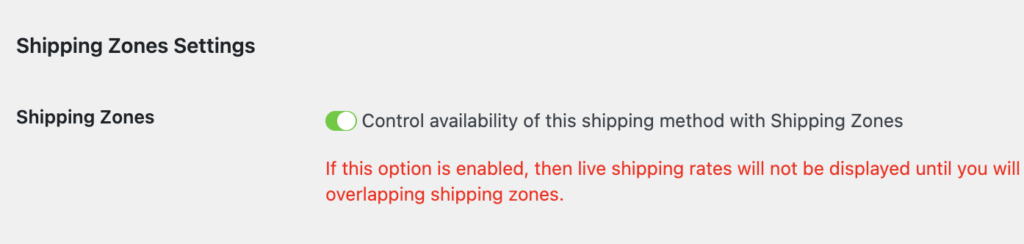
How To Enable Shipping Zone Feature In the Shipping Plugin
Go to 1TeamSoftware’s live shipping rates shipping plugin (such as Shippo Shipping Pro, EasyPost Shipping Pro, ShipStation Shipping Pro)
- Find the “Live Shipping Rate” Tab in the settings.
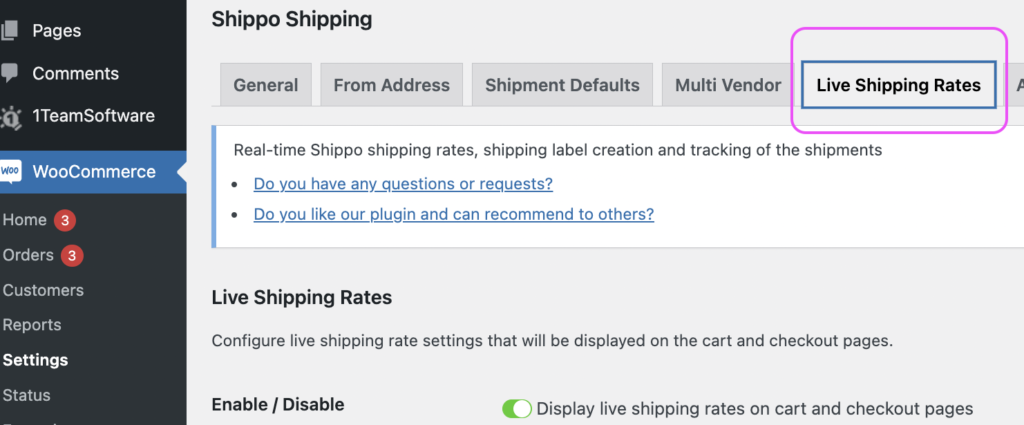
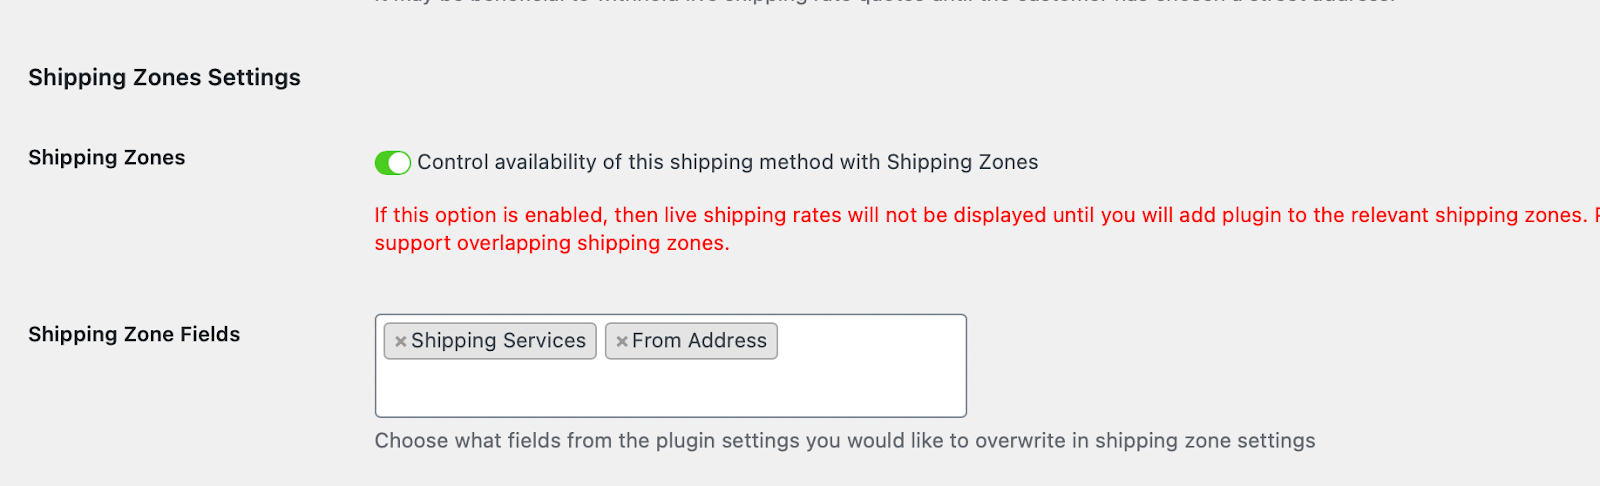
- Enable the “Shipping Zone” feature.
- Add Shipping Services and From Address options to the Shipping Zone Fields.
- By selecting the “From address” option, you’ll be able to calculate live shipping rates based on the configured “From” address.
- By selecting the “Shipping Services” option, you’ll be able to configure shipping services and select the shipping class for the corresponding shipping zone.
Configure Shipping Methods for Multi-Warehouse

Guide to Configure the WooCommerce Shipping Zone
for New York Warehouse
In this section, we will explore procedure for configuring the shipping zone for the New York warehouse within the WooCommerce settings.
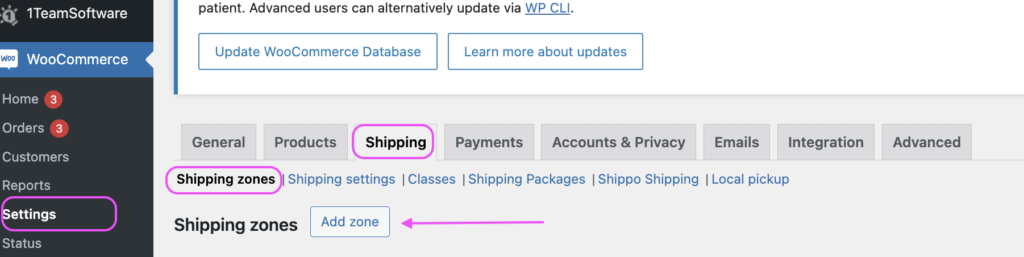
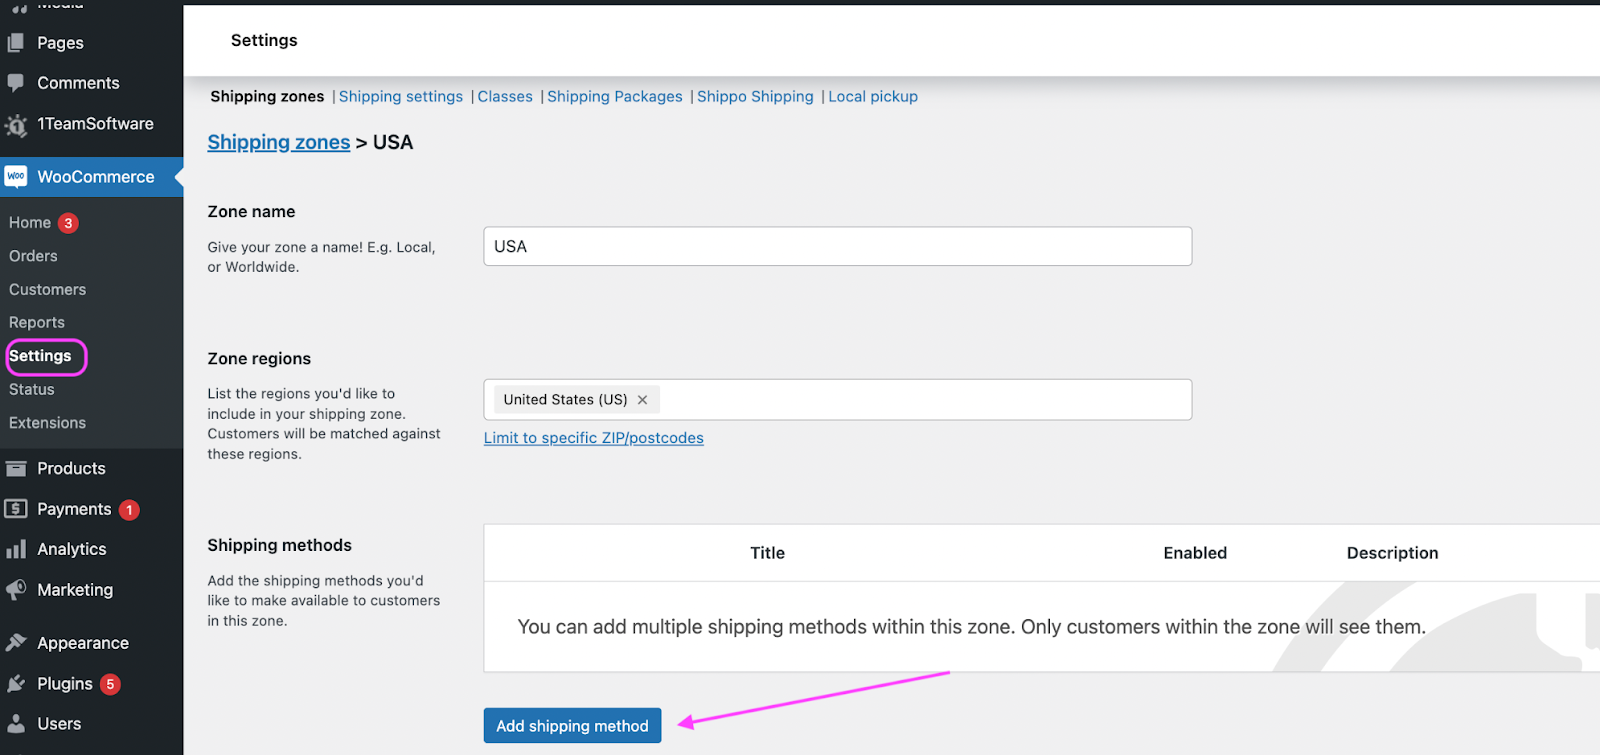
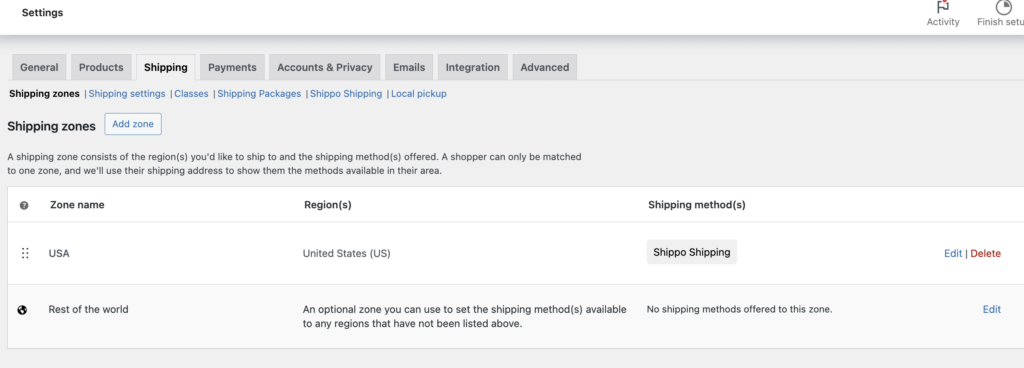
- Go WooCommerce → Settings → Shipping → Shipping Zones.
- Click on “Add Zone”.
- Create USA Shipping zone.
- Ensure you select “US” in the Zone Regions.
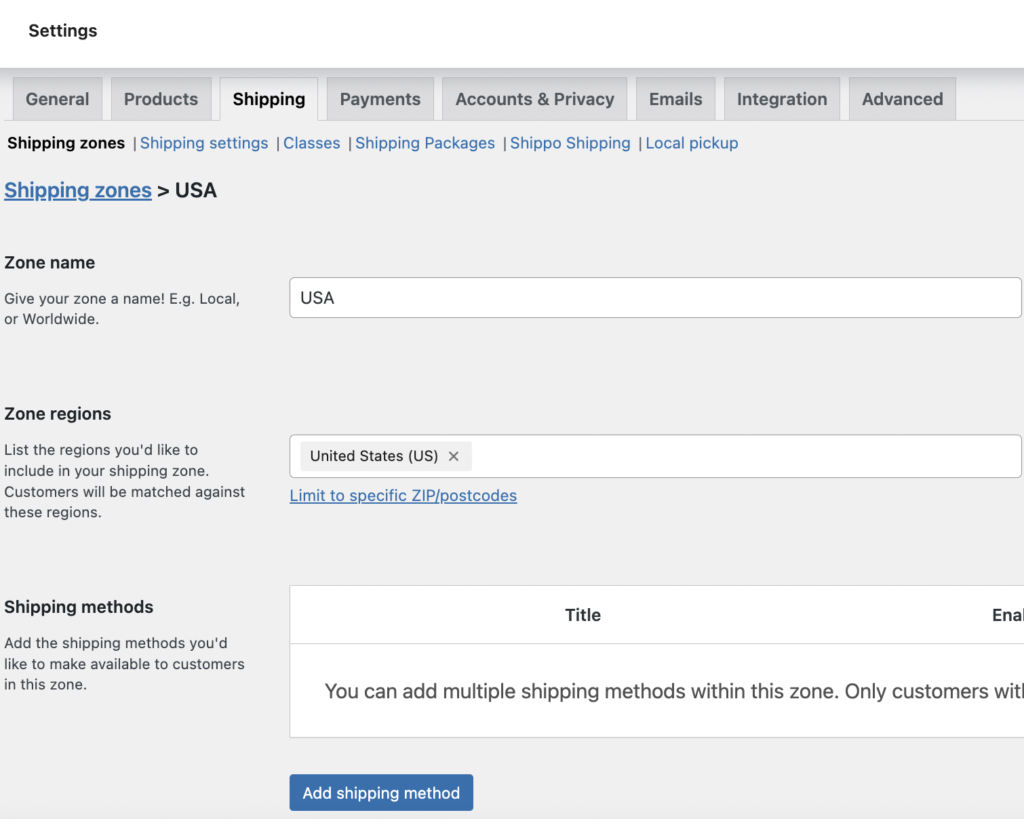
- Click on the “Add Shipping Method” button.
- Select “Shippo Shipping “
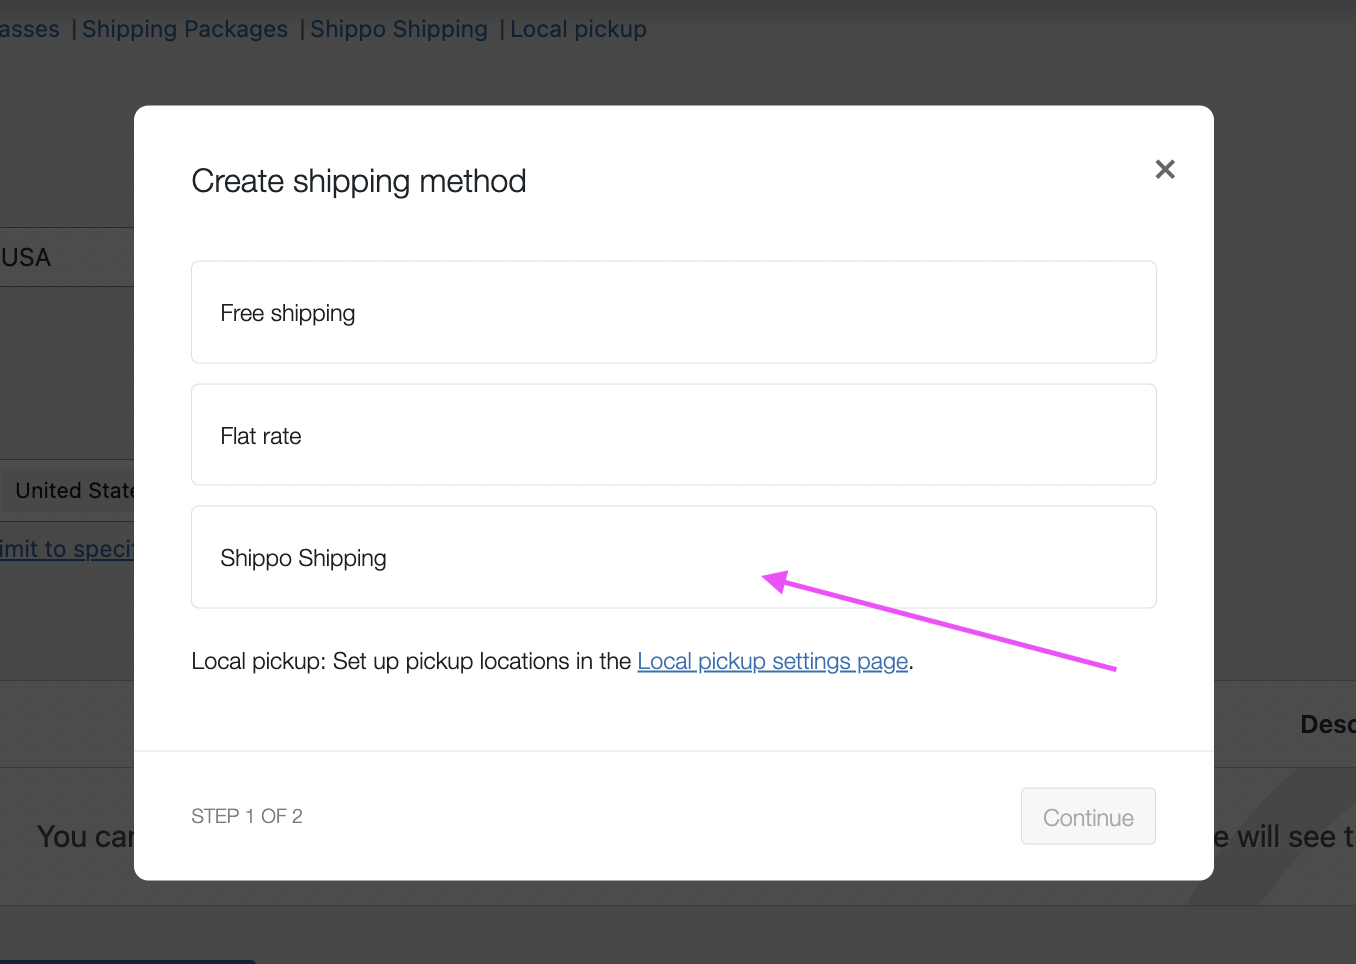
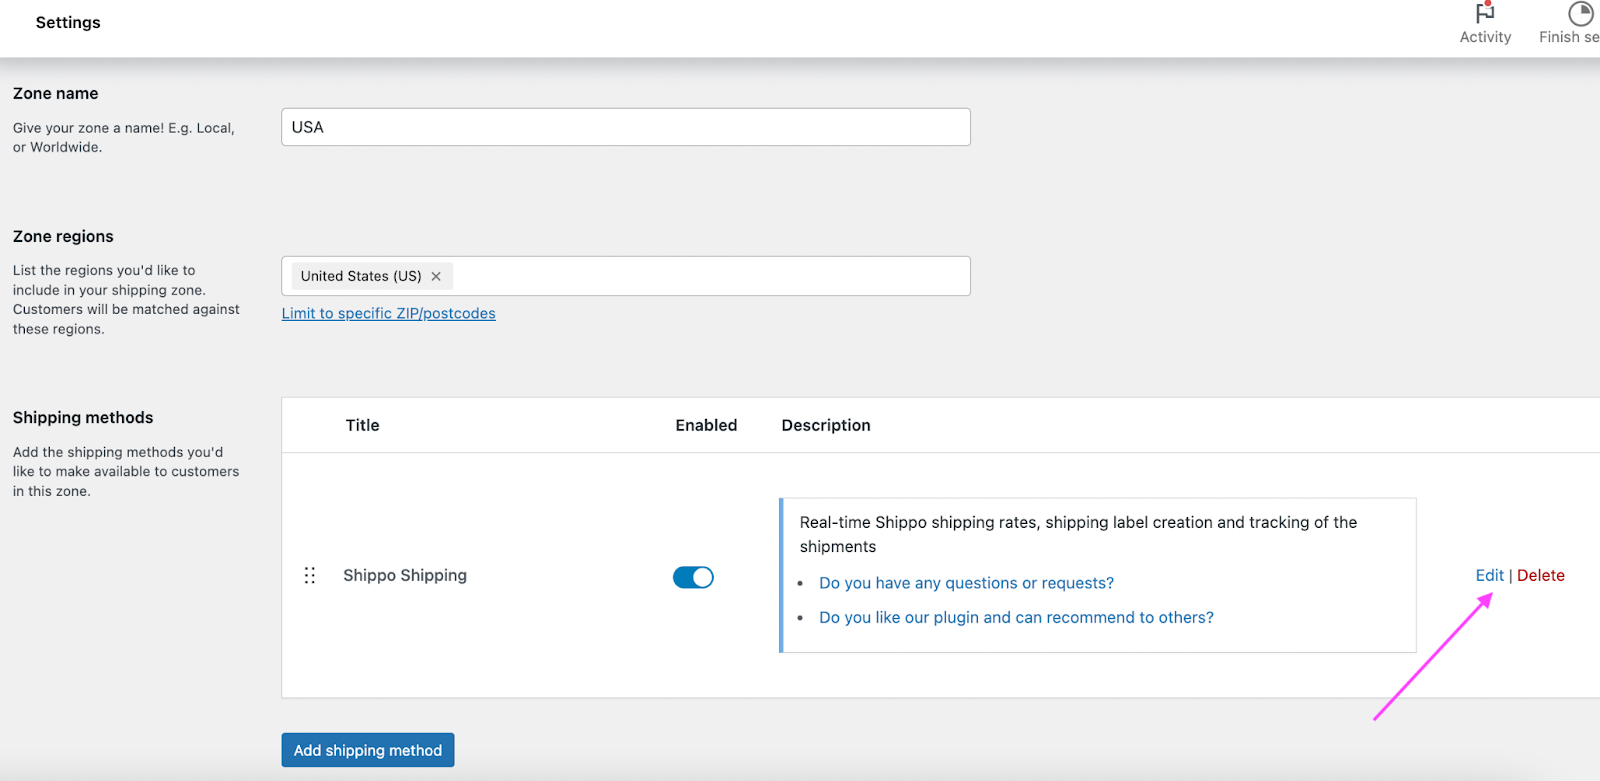
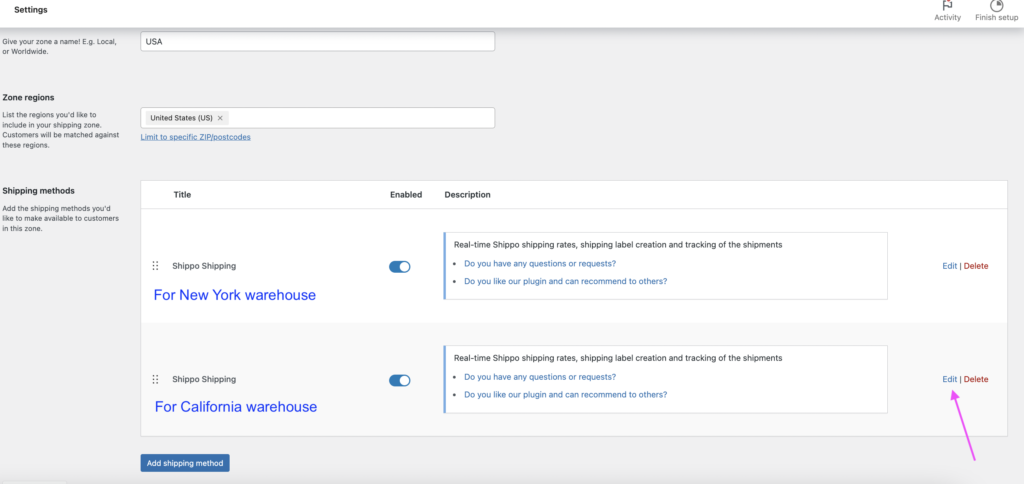
- Then you will see the “Shippo Shipping” has been added as a new shipping method.
- Click on “Edit”, in order to add New York warehouse information for Shippo Shipping.
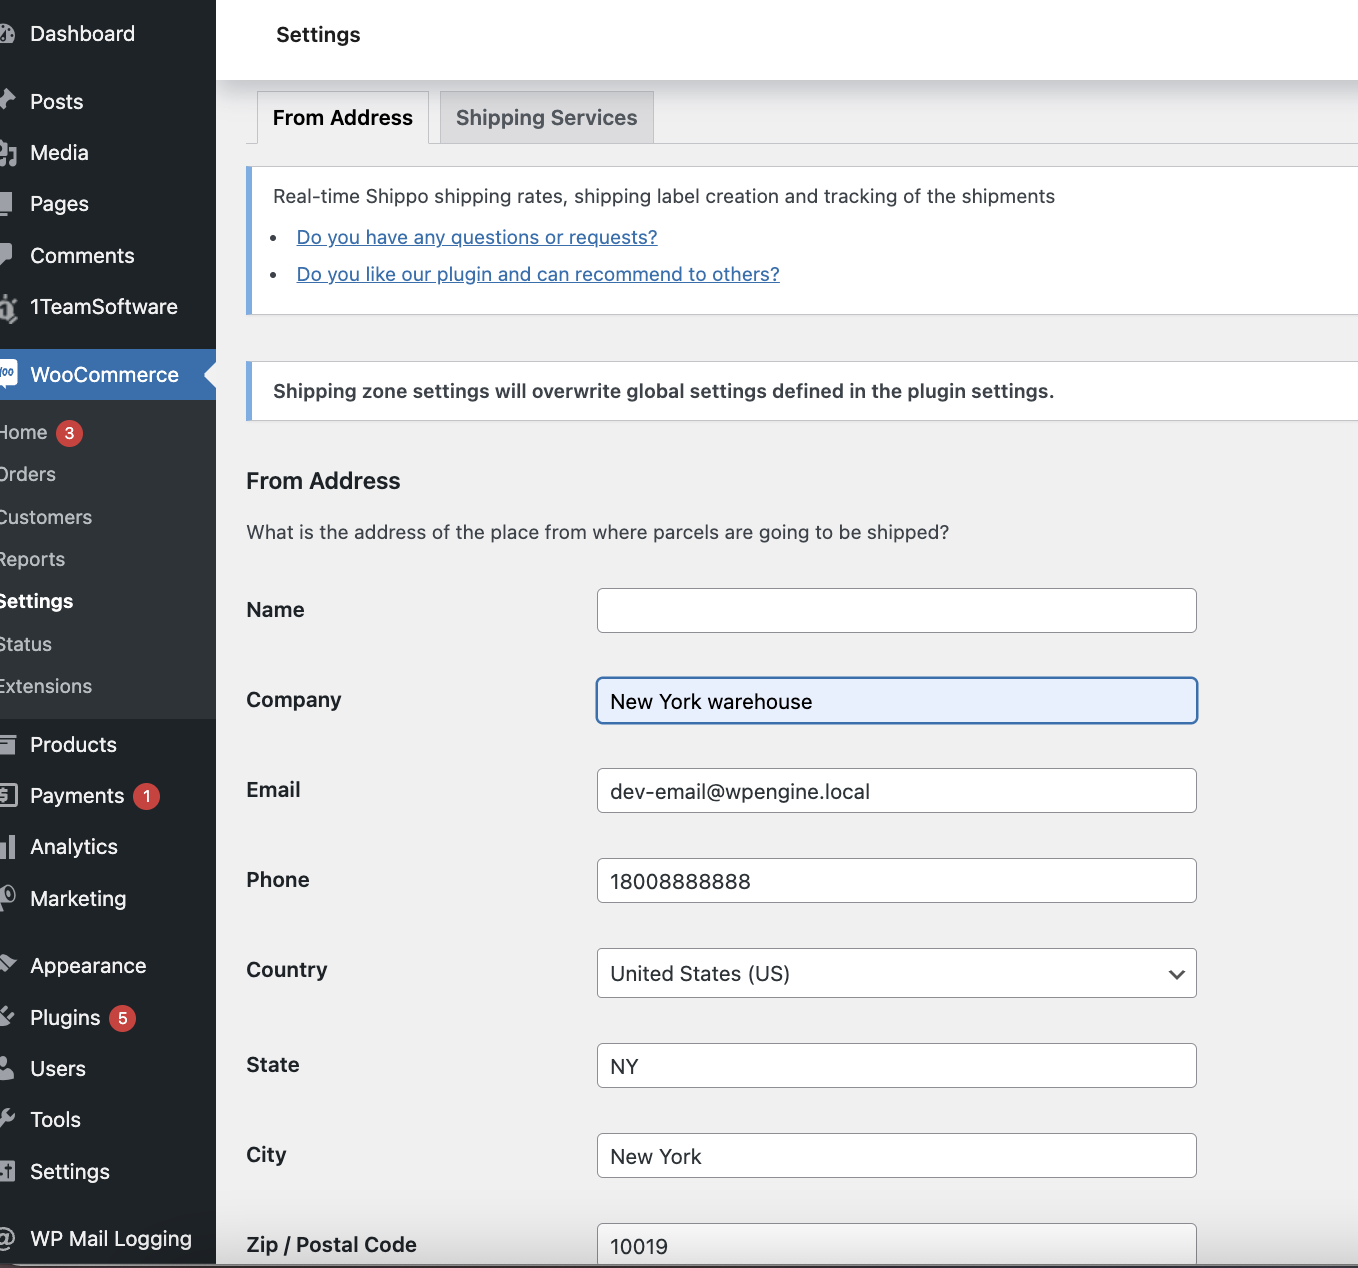
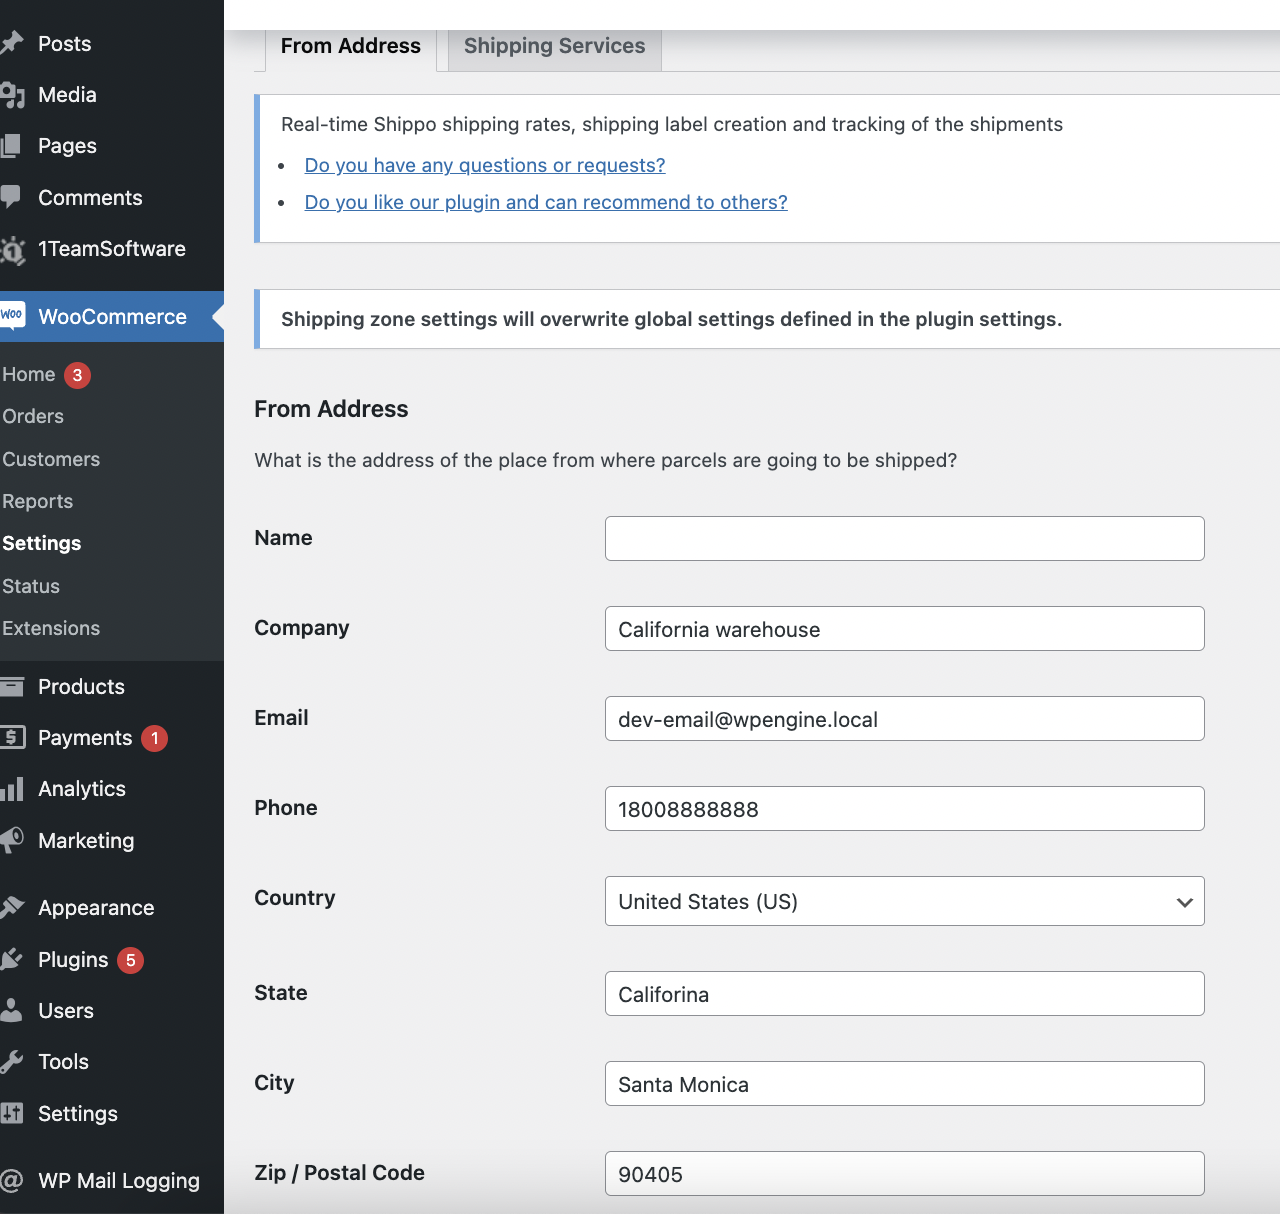
- Then you will see “From Address” tab and “Shipping Services” tab.
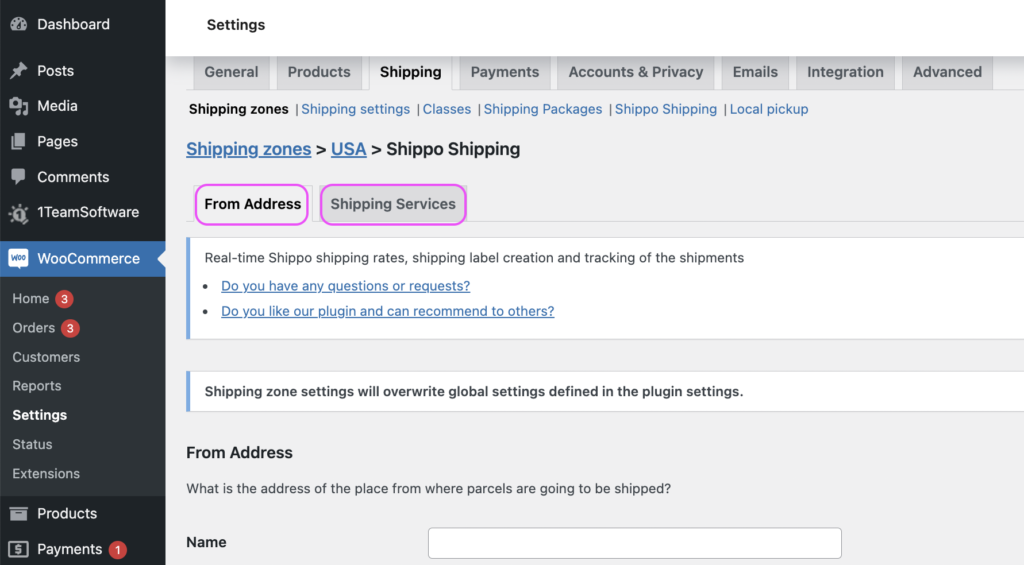
Set Up From Address for Shipping Zone
- Click the “From Address” tab.
- Input the address information of the New York warehouse.
- Save the settings.
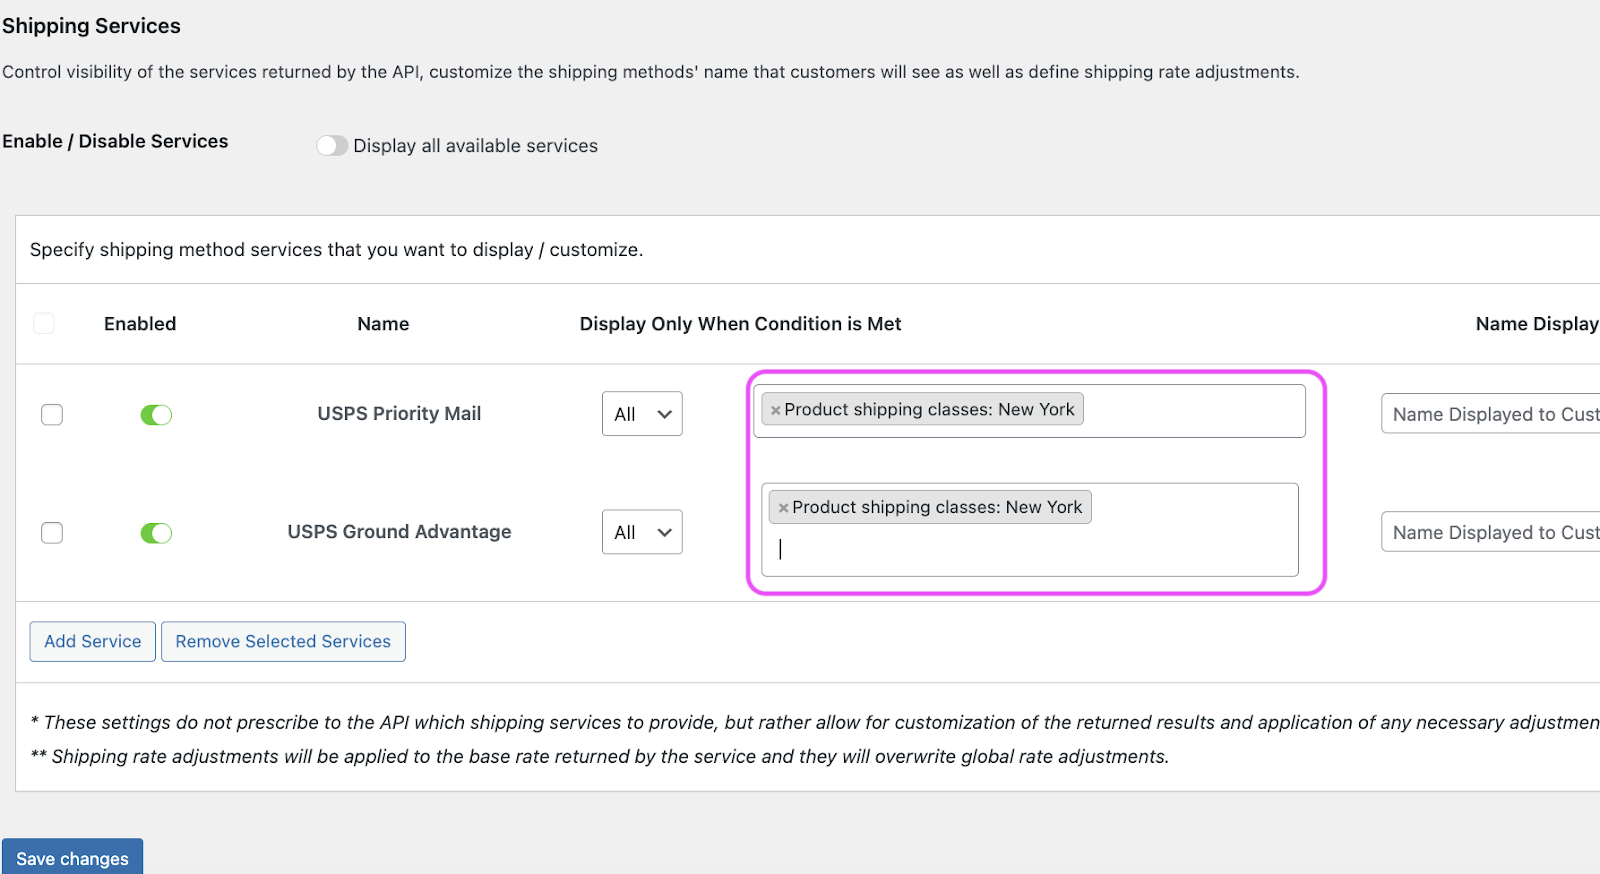
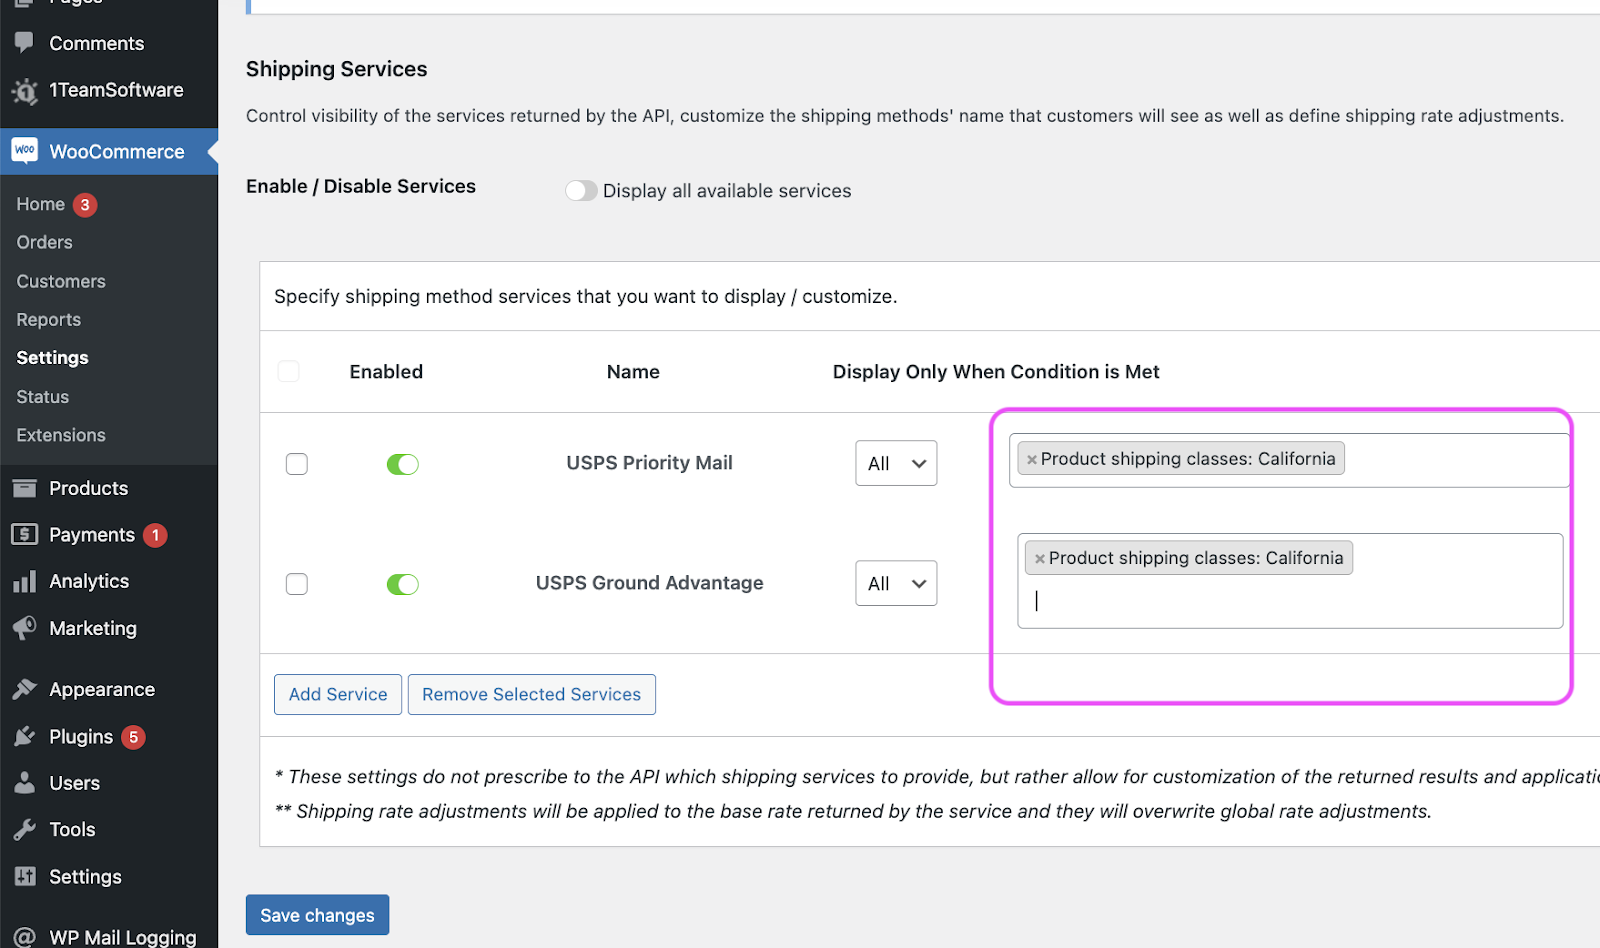
Customize the Shipping Services for New York Warehouse
- Click the “Shipping Services” Tab.
- Enable the shipping services you want to offer customers for the New York warehouse.
- In the condition column, select “Product Shipping Class: New York” to ensure the plugin quotes live shipping rates only for products belonging to the New York shipping class as screenshot below.
- Click “Save Changes” to save the settings.
- Go back to the USA Shipping zone.

Guide to Configure the WooCommerce Shipping Zone
for California Warehouse
- Follow the same steps, and add “Shippo Shipping” as a new shipping method, so now you have two Shippo shipping in the USA shipping zone.
- Click on “Edit” on the newly added Shippo Shipping, which is for California warehouse.
- Repeat the same steps, input the address information for the California warehouse.
- Ensure to save the change.
Customize the Shipping Services for California Warehouse
- Enable the shipping services you want to offer customers for the California warehouses.
- In the condition column, select “Product Shipping Class: California” to ensure the plugin quotes live shipping rates only for products belonging to the California shipping class.
- Click “Save Changes” to save the settings.
How to Test Live Shipping Rates Configuration from Multiple Warehouses
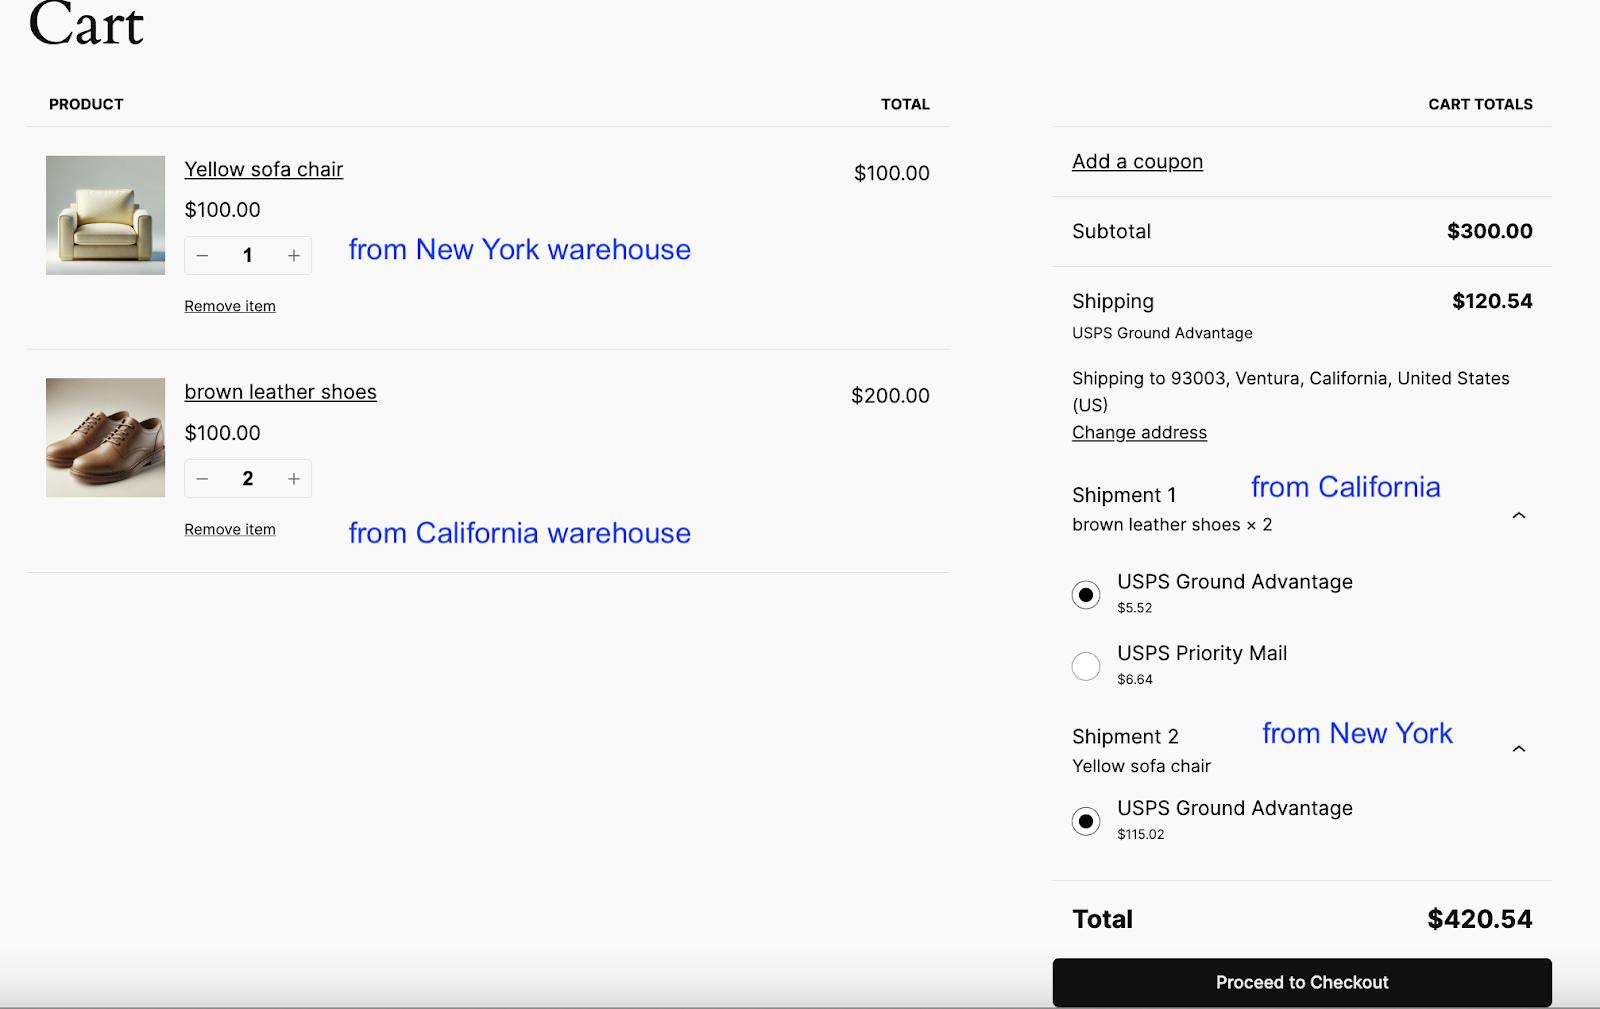
To ensure that shipping packages are correctly separated based on warehouse location and that live shipping rates are accurately calculated, follow these steps to test:
- Add Products to Cart: Place products from both the New York warehouse and the California warehouse into your WooCommerce cart.
- Verify Package Separation: Check if the plugin correctly separate products based on their warehouse locations. Refer to the screenshot below for an example of products separated into different packages.
- Confirm Live Shipping Rates Calculation: The plugin calculates live shipping rates for each product based on its respective warehouse address. It then displays the total shipping cost for the entire order, ensuring that the customer only needs to make a single payment.
By following these steps, you can confirm that the live shipping rates plugin accurately handles products from different warehouse locations, providing a seamless experience for your customers.
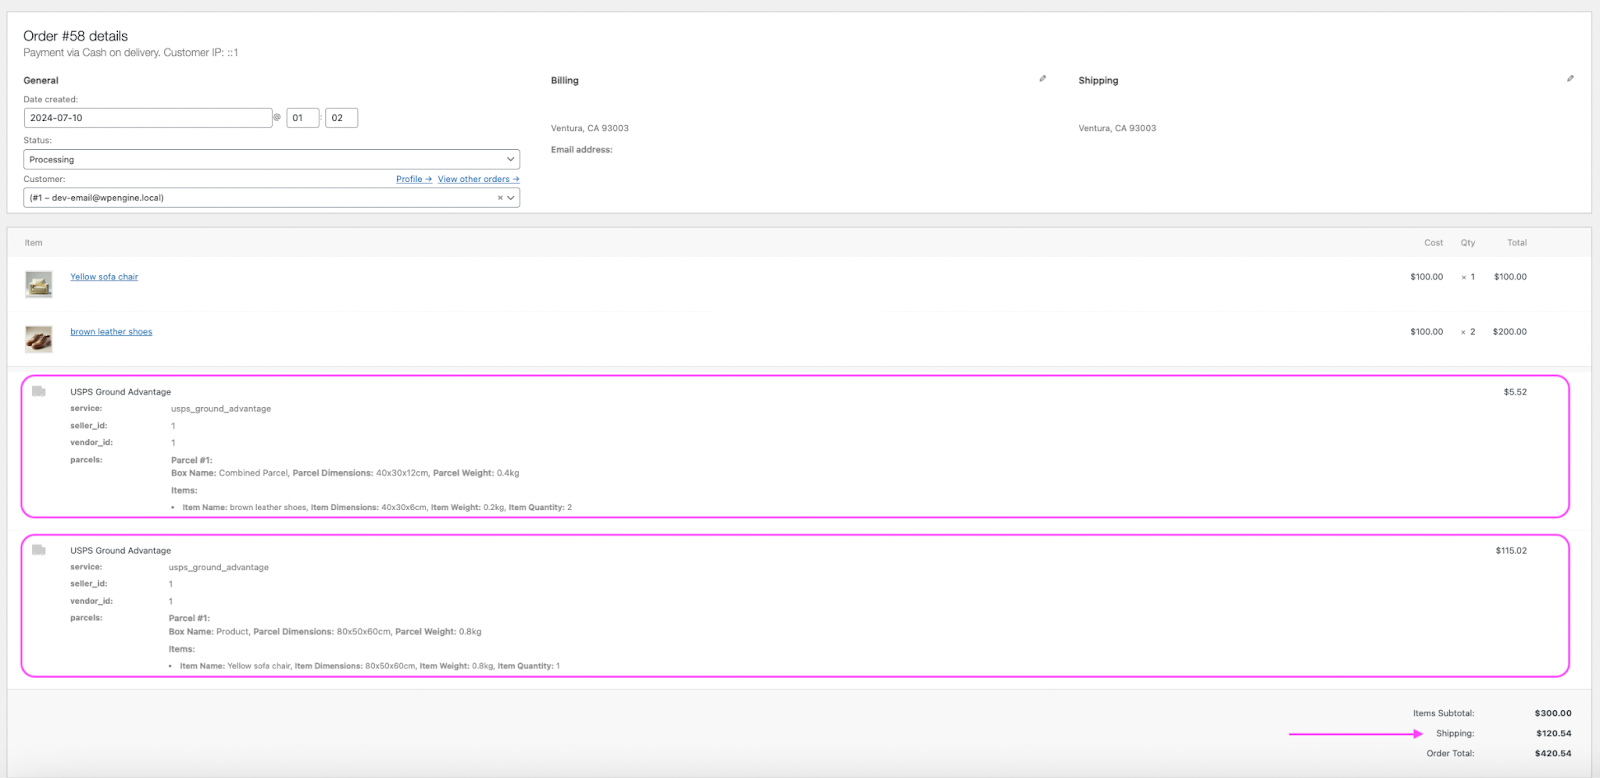
- When the customer places the order, the shipping costs for the two products will be listed separately in the order details.
The Benefits of Using Live Shipping Rates Shipping Plugins and Shipping Packages Plugins
Implementing a multi-warehouse shipping strategy in WooCommerce can significantly enhance your e-commerce operations, leading to faster deliveries, reduced costs, and improved customer satisfaction. By leveraging the powerful plugins developed by 1TeamSoftware and following this comprehensive guide, you can transform your shipping logistics into a competitive advantage.
Remember, the key to success lies in careful configuration and ongoing optimization. Whether you choose to set up the system yourself or opt for professional configuration services, investing in a robust multi-warehouse shipping solution will pay dividends in the long run, helping your e-commerce business thrive in an increasingly competitive marketplace.
If you’re looking for a more advanced shipping setup and prefer each warehouse to fulfill its portion of the order independently, consider using our Package Order for WooCommerce plugin. This powerful tool automatically splits the main order into separate orders for each warehouse, streamlining fulfillment and improving efficiency.
For more details, visit the link below to learn how the Package Order for WooCommerce plugin can enhance your WooCommerce shipping process.
Need Help? We’ve Got You Covered
While this guide provides a comprehensive walkthrough, we understand that configuring shipping plugins can be complex. That’s why we offer White Glove configuration services. Our team of experts can set up your WooCommerce store for optimal multi-warehouse shipping, allowing you to focus on growing your business.
Ready to streamline your multi-warehouse shipping? Download our free Shipping Packages Plugin and check out our range of Live Shipping Rates Shipping Plugins today. Your customers will thank you.
For more information about our White Glove Configuration Services, please visit the link below.